Side Seams and Uncertainty

Uncertainty looms / As the dread day approaches / The future at stake / Will every voice be heard now / Or will courts decide again?

Election day is tomorrow and it’s my last week of work. I’m trying to acknowledge the amount of uncertainty and fear I have right now. It’s a lot. I find myself relying on my project for comfort. It’s nice to have something that will be exactly as I left it the next time I pick it up.

My new thimble arrived. I plan to watch a few more instructional videos on unshin (a traditional though not period documentable Japanese sewing method) and then give it a shot on some scrap fabric later this week.

Stitching of side seams continues.

Tanka

I finished the false back seam of the kosode last night.

Darting to and fro / Above and below the silk / Racing through the task / My needle leads thread along / A delicate hide and seek

It seems my desire to write poetry was well timed. Saionji no Hana has issued her yearly challenge for November, one tanka every day for a month. Yes, please.

So what’s a tanka? It’s a form of waka or Japanese poetry. You’re likely familiar with the more modern haiku, a poem with a syllabic count of 17 in a 5/7/5 arrangement. The tanka was exceptionally popular in the Heian period. It has a syllabic count of 31 in a 5/7/5/7/7 arrangement, and was usually written as a single line.

I’m excited to share what I come up with here and on the SCA Japanese Facebook group.

As for the kosode, I decided to move on to the side seams next. I’ve marked both sides with a 1 cm seam allowance and a stop point 40 inches from the hem.

I broke down the task of sewing the kosode into chunks, in this case, each seam has about a day. Following this, I should finish the kosode in just over a week. November 12 is the garment due date I’ve set. I may need the few days wiggle room to finish the raw edges of the silk with a rolled hem.

I also completed my first monthly check in for C3 yesterday. So far, so good.

Nikki and Blogging

No, not a person. Nikki means diary or journal and refers to a particular style of Japanese literature.

One of the reasons we know as much as we do about the minutiae of Heian court life is journaling. A number of aristocrats kept records that survive.

Please note, this is just a very small amount of surviving texts from an incredibly small segment of the population. As is so frequently the case, the lives of those who did not benefit from a lucky birth into a noble family with rank are more or less lost to us. There are few records to indicate what life was truly like for the “common” person. It is a subject I will endeavor to explore and amplify as I am able. A great deal of research will have to wait until I can read Japanese, but that’s another project.

Two women rose to literary prominence in the early years of the 11th century, Sei Shonagon and Murasaki Shikibu.

I quoted Sei Shonagon previously. She served as a gentlewoman to Empress Taishi. Her surviving work, The Pillow Book, gives glimpses of Heian court life through her infamous lists of things like “Infuriating Things” and “Awkward and Embarrassing Things” or “Things now useless that recall a glorious past”. Under that last one is “a switch of false hair seven or eight feet long, that’s now fading and taking on a reddish tinge.” And there we have primary source example of the use of false hair. Neat, huh?

The Pillow Book is not a nikki. It’s a book with what I think of as aspects of a nikki, and described on Sei Shonagon’s wiki page as “a collection of lists, gossip, poetry, observations and complaints”. But I’m letting my modern notions of a diary or journal color my perception of an ancient Japanese art form. The Pillow Book is a whole different genre.

Sei Shonagon’s rival, Murasaki Shikibu, gentlewoman of Empress Shoshi, author of the Tale of Genji, did write about Sei Shonagon in her nikki.

“Sei Shonagon is very arrogant. She thinks herself so clever and litters her writings with Chinese characters, but when you look at them carefully you will find many errors. Those who want to behave as if they were superior to others will lower their reputation. Will their future be brighter?”

That had to sting. You can read a bit more in this fun blog post.

The reason I was thinking about nikki today is this blog. In a way, it’s my own diary. It’s yet another way I’m connecting with my project (and my research in general) that is reflective of a period practice. To that end, I’ve decided to toss a little poetry into the mix.

Stay Tuned.

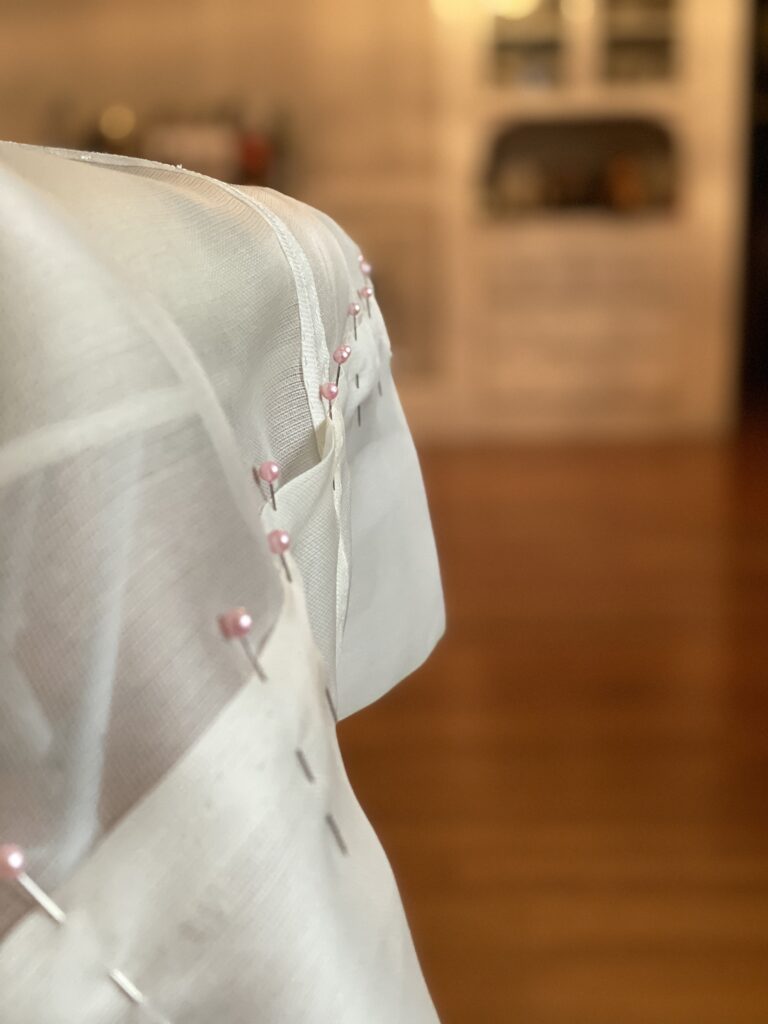
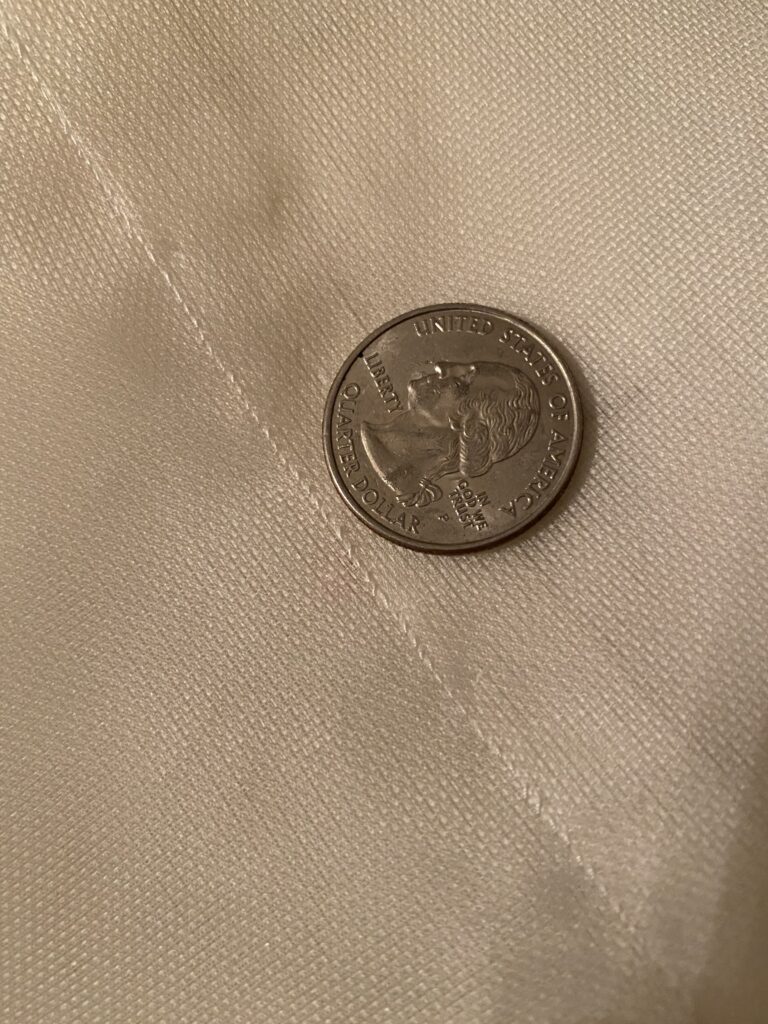
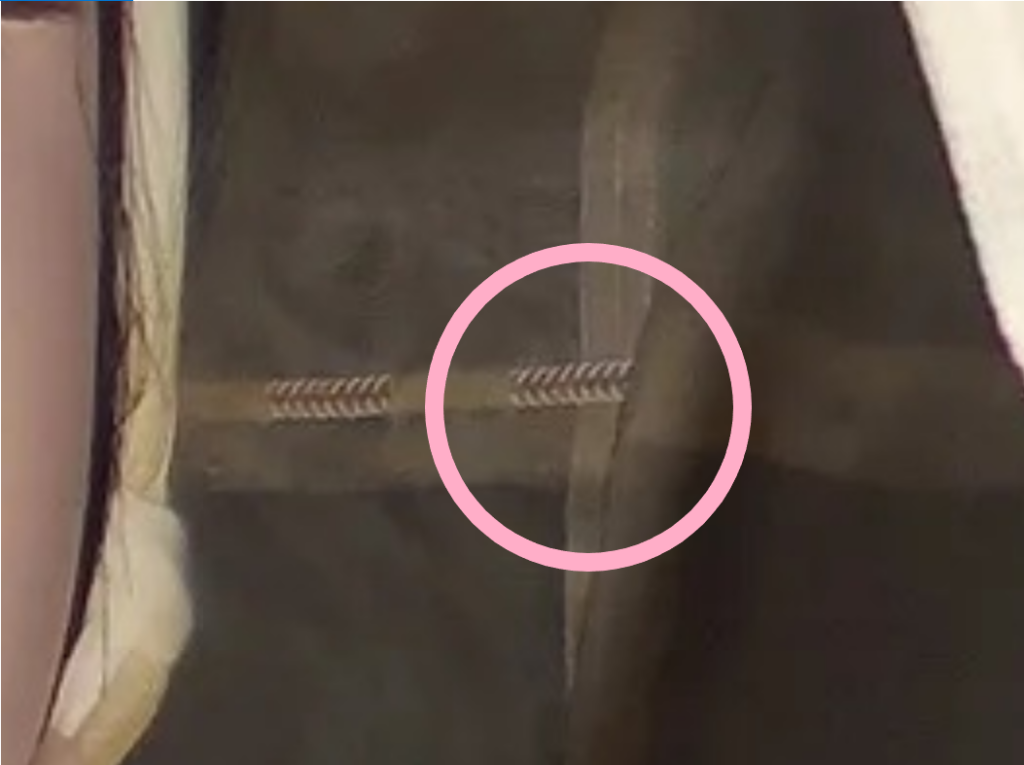
Oh. And work on the kosode continues…of course.

Snow and Stitches

First snow of the year. I expected a dusting. We got 4+ inches.

I spent the day fetching supplies and staying in touch with a friend. It’s a bad feeling to get to the market and realize you forgot your mask and the backup you keep in the car is missing. Oh well.

We had socially distanced evening in the back yard, in the snow. Fire and Friends. Marshmallows and Merrymaking. I needed that.

I didn’t get much done in the way of sewing. But it has begun! Hitting that 10 stitches per inch or so mark is difficult. I think I’m getting 9 so far. I’ll get there. It is significantly faster than those tiny felling stitches on the mushi no tareginu (curtains).

This is my first handstitched garment. I can give myself a little grace. I’ll get better and faster. Which is good because I’m starting to feel a little deadline pressure.

I do find myself wishing I had a Japanese thimble. This would be an amazing opportunity to teach myself unshin, a traditional Japanese sewing method. Hmm…

Ok, I did a thing just now. I bought a ring thimble online. Less than $5. It’ll be here Monday. I’ll try out unshin and see how it goes. If I find that I really enjoy the sewing method, I’ll eventually commission a friend of mine to make a proper thimble for me.

Who Sews?

Time for more research.

In general, I’m trying to answer questions with the outfit. The Who, What, When, Where and Why of it.

We know it’s a travelling outfit, worn when a Heian lady was travelling on foot, likely to a shrine. The Nuikata (the book I’m using for patterns) gives technical instruction, so I have resources for how it was made.

I was curious, who would actually make this outfit in period?

And I found an answer in The Pillow Book by Sei Shonagon. Hooray for primary sources!

“[90]Infuriating Things. … Having hurriedly sewn something, you’re rather pleased with how nicely you’ve done it – but then when you come to pull out the needle, you find that you forgot to knot the thread when you began. It’s also infuriating to discover you’ve sewn something inside out.”

She goes on to describe a time when the gentlewomen were given a rushed sewing task for Her Majesty and someone sewed a sleeve backwards and then refused to correct her mistake.

We see from this snippet that women of rank who served as gentlewomen were well practiced at sewing and constructed garments for their mistress. It is reasonable to assume that they would do their own sewing having no gentlewomen to do it for them.

That may not seem like a lot, but the information helps to tell the story of the outfit.

And it’s a good reminder to make sure your thread is firmly knotted when starting to stitch!

Lost in Translation

“Sew seams at 0.8cm. Seam allowance is 0.2cm.”

Umm…What?

I’ve spent today trying to translate the instructions for the men’s undergarments and the women’s hitoe (the green layer in the museum images).

There is no standard seam allowance. 0.8, 1, and 1.5cm all are used.

There’s an instruction to “add glue and twist”.

That’s right, glue and twist. But what? A teeney rolled hem but with glue instead of thread? Is that how the raw edges of the overlap panel (okumi)are finished? This is not something I can learn in the next month. So here lies the day I made another choice to be less accurate so that I can actually make the project.

It’s possible that the 0.2cm has something to do with the seam treatment of the hitoe. The instructions translate to something along the lines of “fold seam into triangle”. I can tell from the image it’s a seam treatment, but I’ve no clue how to do it. Ok, now thinking about it, the hitoe is mostly marked (possibly thread marked?) at 0.8cm and then maybe stitched with 0.2? Maybe that’s a better translation.

The translation I get does shift a little too, so I’m going to keep revisiting it. I’m using Google Lens to translate. I’ll seek out another app or two and see what kind of translations I get from them before starting on the hitoe.

For now I think I’ve decided to use the men’s undergarments as a guide for the seam allowance for the kosode as it is also an undergarment. They both use 1 cm. So I’ll be using 1cm or 0.4inches.

I did read something in the instructions for the men’s undergarments that the stitch length should be 0.2-0.3cm. So I’m aiming for 10 stitches per inch. For comparison, the tiny stitches for the mushi no tareginu (curtains) are approximately 20 stiches per inch.

This is still going to be rather small stitching.

A Little Further Along

Finished felling down the fold over for the mushi no tareginu (curtains).

Still to go on the hat – trim the cords to the same length, cut the slits, weave cords through and knot them, remove old curtains from hat, attach new curtains to hat.

That’s right. This part of the project is a make-over. There’s currently a rectangle of cotton scrim sewn to the hat. It’s highly wrinkled and has discolored from age. I’m immensely happy to upgrade it.

But I think I’ll leave the hat for now and start sewing the kosode. I’ll double check seam allowances and get started first thing tomorrow.

I’d be more concerned about falling behind (currently at low levels), but I’m about to have a whole lot more free time. 4 work meetings left. Then it’s full concentration on this project.

Tiny Stitches

I’ve been working on stitching down the overlap of the mushi no tareginu (hat curtains).

Fabric hangs over the edge of an ironing board. It has been folded back on itself and held in place by pink-headed straight pins.

It’s taking forever. There’s something about the silk gazar fabric that just wears on the thread. I’ve had to cut out knots. Multiple times. The thread actually un-twists itself by the end. So I have to go super slow. This thread is 3 ply.

I had to know. I looked it up. It’s the weave. Gazar is woven with twisted thread. Twists mean texture, this texture is abrasive. Just a little.

I’m using a tiny felling stitch. Like super tiny.

A line of impossibly small stitches runs diagonally from left to right with a quarter as a size reference.

They’re invisible at arms length. Tiny stitches take time. Lucky for me the garments go together with running stitch (which I’m much faster at) and I don’t have to use stitches this fine in many places. Mostly just this one 64 inch seam. Halfway there…

There’s still so much to do!

25 Days In

Finally finished ironing down the fold on the migoro (body panel) for the false back seam of the kosode. It wouldn’t have taken so long if I wasn’t filming it.

Yeah, it’s a kind of weird thing to film, but I’m also working on documenting this project via video. I needed (wanted) the small shot of it being ironed. 20 minutes of set up for a one minute clip. I hope to be able to find the time to edit along the way, but if I end up doing all the video editing at the very end, so be it.

A thing I need to work on is not postponing work on a piece of the project because I needed (wanted) to film and have lost the light. I had other things to do, but it’s something I just want to be careful about.

If anyone is wondering what I’m going to do with the flat braid, I’ll shift it to the next project as it is perfect for the sleeve ties on a hitatare kamishimo (men’s outfit in which the top, called a hitatare matches the hakama or pleated trousers). I’ll have to order more silk thread to weave a matching cord and the round cords for the chest ties, but that’s a problem for late January/early February.

With respect to weaving the kazari-himo (decorative cords) through the mushi no tareginu (curtains), I was able to see in the super zoomed in photo that the cords overlay the seam that joins panels together.

Pink outline of a circle around a cord woven through fabric laying on the viewer's side of the fabric on top of a seam where to pieces are joined.
Circle indicates where cord(s) pass over the seam. This is on the inside of the mushi no tareginu (curtains).

So I’ll make sure to have the weaving pop out at the right place, and I’ll join the cords together with a few stitches. It’ll be historically adequate. I still feel good about it. I am curious as to why I don’t see cords woven through above the folded down seam in this part of the image though

Pink arrow pointing to a lack of cord woven through the fabric that is visible further left in the image.
Arrow points to the lack of visible cord

This is why it’s historically adequate and not historically accurate. I’m doing my best with zoomed in images.

A Plan for Kazari-himo

I did a quick google search to find more images and hit a near jack pot. I’ve done the same search before, but was looking for copyright free images that time.

They are most definitely NOT attached to the hat. I don’t care what the line drawing has on it. The line drawing is wrong.

The Costume Museum mannequin of a lady wearing a travelling outfit and ichime gasa with mushi no tareginu or hemp veiled sedge hat. The mannequin stands with her hands outstretched parting the sheer curtains hanging down from the very wide brimmed straw hat.
Woman in travelling outfit with ichime gasa

The kazari-himo (decorative cords) are woven through the panel, popping out at the halfway mark.

This image also lets me see the lady’s obi poking out beneath the fold of the garments, so we know the knot is tied in front. The kake-mamori amulet case, the rolled item around her neck beneath the kake-obi the red belt across her shoulders is worn under the kake-obi. You can see the cords that the kake-mamori is hanging from passing under the red.

We can also see that pattern matching on the garments is not a thing. This isn’t to say that it wasn’t done, just that it is acceptable to not. This makes me happy.

And while we’re picking this image apart, I’m confused by her feet. Where are her tabi socks? Was it really appropriate to wear zori (shoes) without tabi?

So now my question is – how do I best recreate what I’m seeing in this image? What I thought was a chevron pattern in a flat braid is likely two pieces of round braid. There is a little bit of a loop on the left hand side, so I’m confident enough in the two round braid idea. It also explains the weirdness I was seeing on the left hand side of my super zoomed in shot.

My first idea is to lay out the cord like the outline of a capital “T”. The arms of the T would be loops. Each panel gets a cord woven though it like that. The tips of the T arm loops will be tacked down to the panel.

I feel good about this plan. Like good enough to cut little slits in finished panels kind of good.

I also think this image will serve as my main presentation image. A side by side with it and me in the finished outfit in the same pose will look fabulous. The side by side was a bit of advice from a commenter on my first A&S display in September.

Hooray for finding just what you need on the internet!

Follow by Email
YouTube
YouTube