Tension

One of the reasons I leapt into the Calontir Clothing Challenge was to give me something to focus on other than my grief. I had just lost my darling animal companion, a yellow fronted amazon parrot named Loretto. He was my world.

And now I find myself thrust into the position of shoving more grief onto this project. I’ve lost a job I love, the best I’ve ever had. My industry is dying. Theatre as we knew it is in a death scene. So I’m also mourning my career to some extent. Maybe things will be better after the pandemic. If theatre comes back, the job I love might be mine again. There is a tiny glimmer of hope.

And I’m going to cling to that and keep working on this project. I know it’s a lot to put on a project, but here we are.

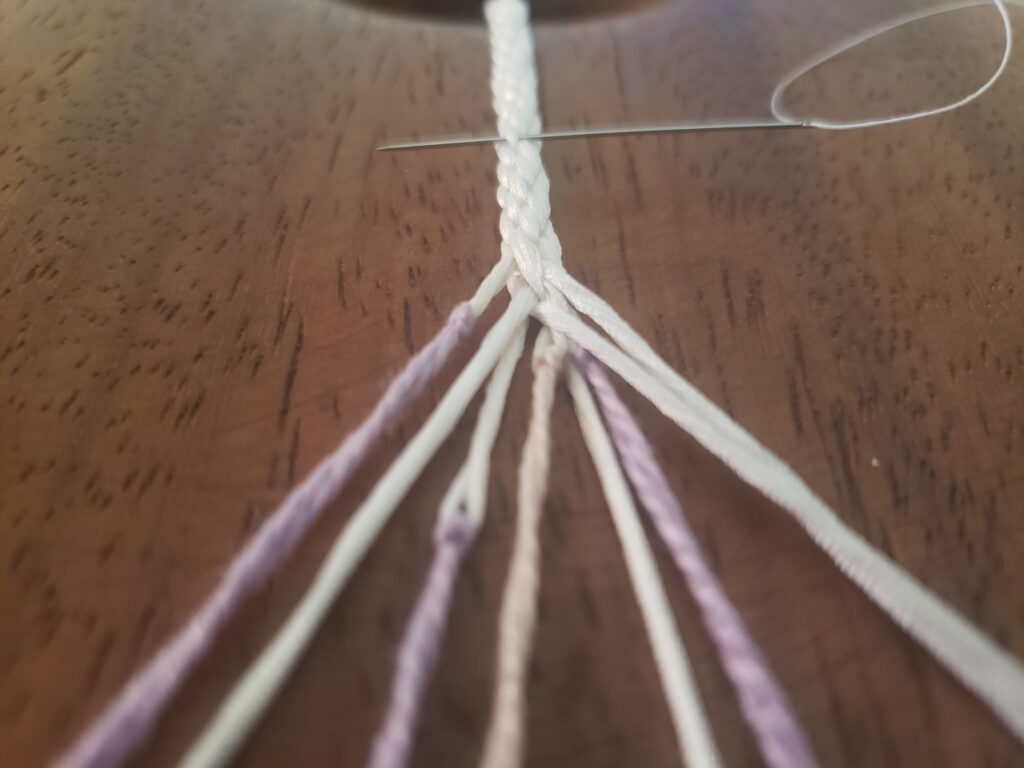
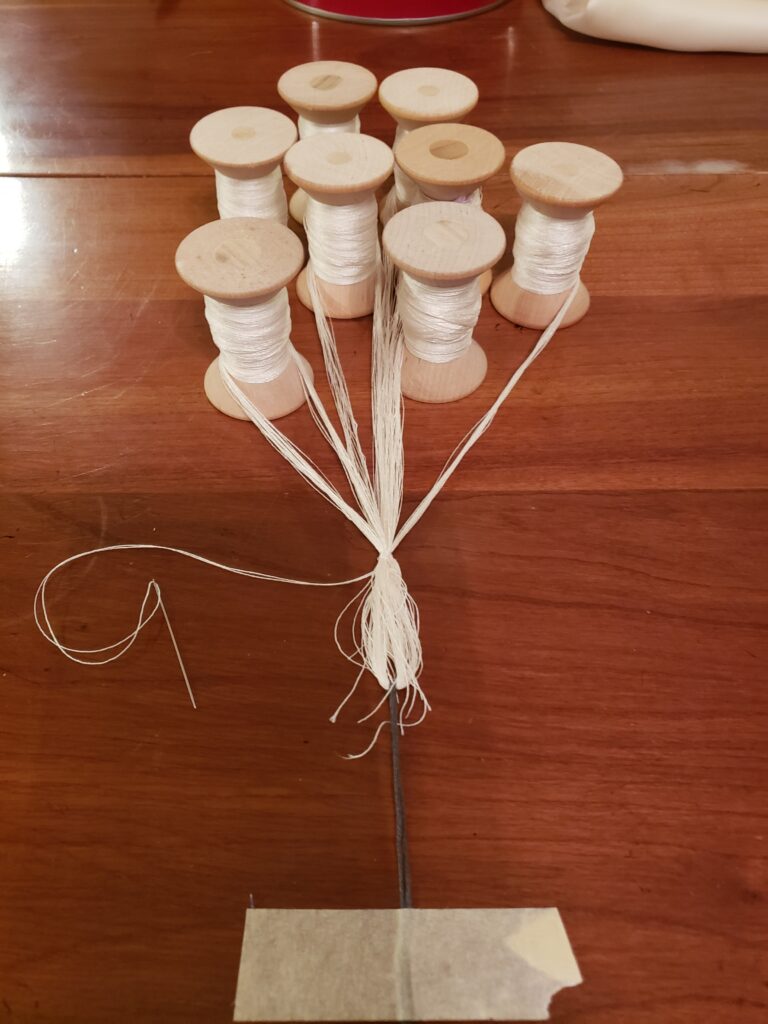
I stayed up way too late last night weaving, so this morning I started at 83 inches. I’m not kidding around about throwing myself into this project.

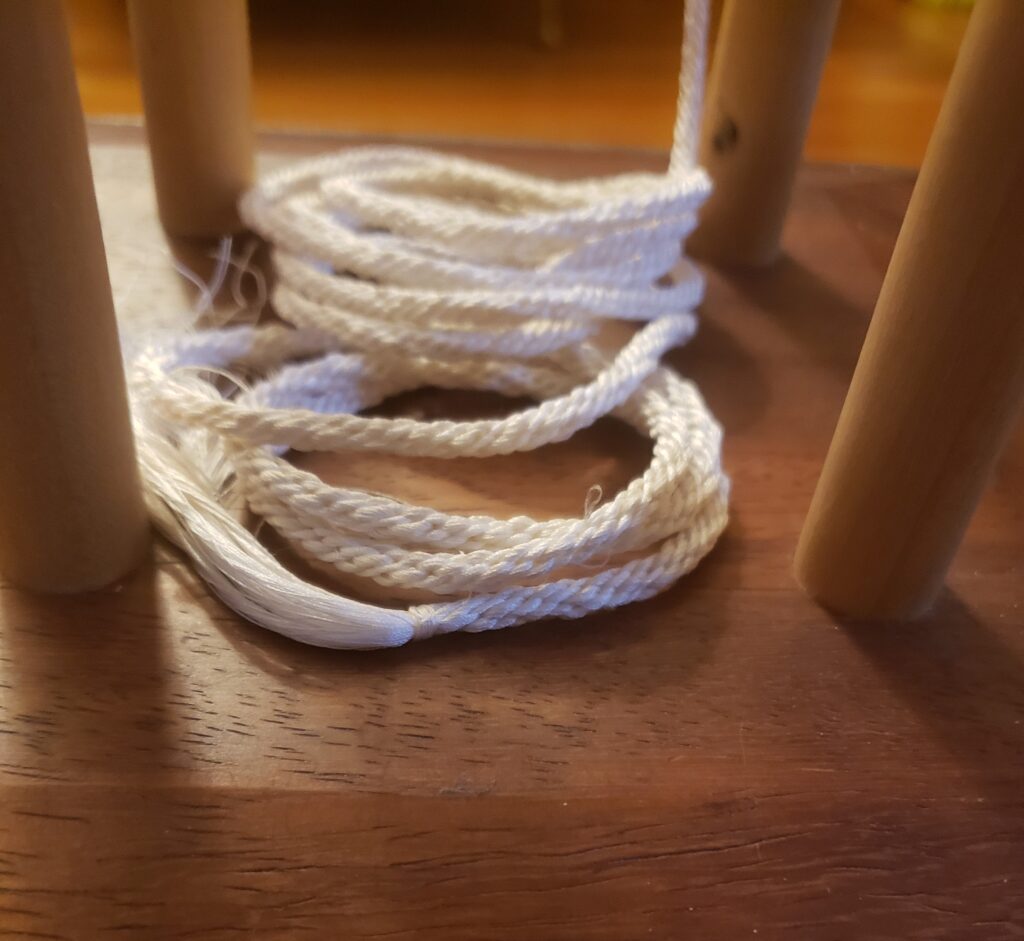
I’ve been dealing with what seem to be more tension issues with individual threads within strands being off. The finished product doesn’t appear to have been affected. I did top out at a blazing 37 inches per hour. I certainly feel it in my shoulders.

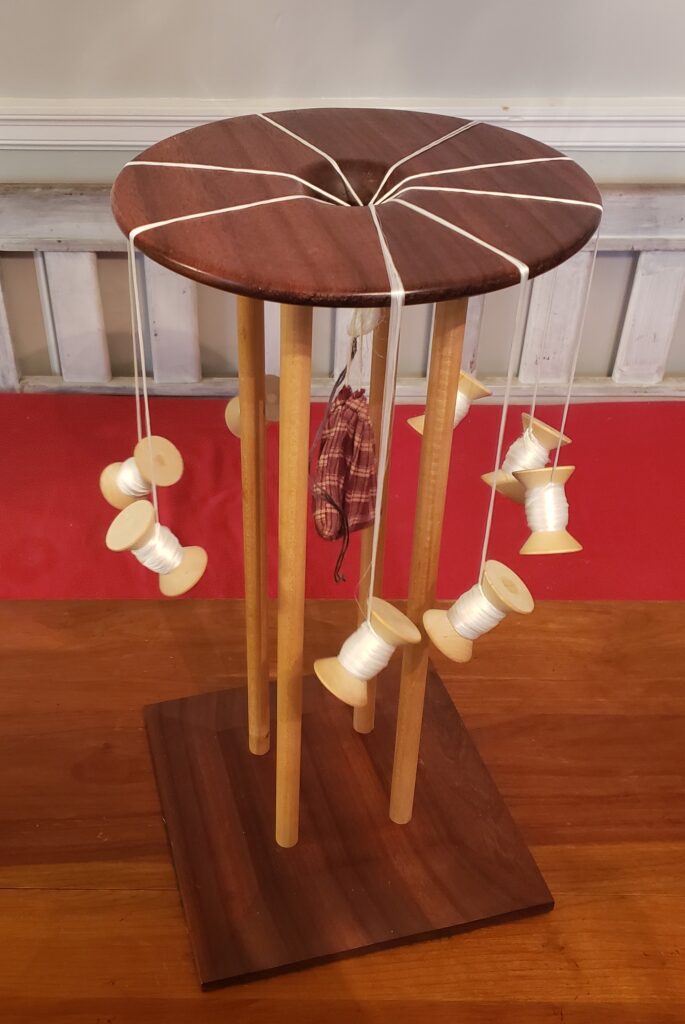
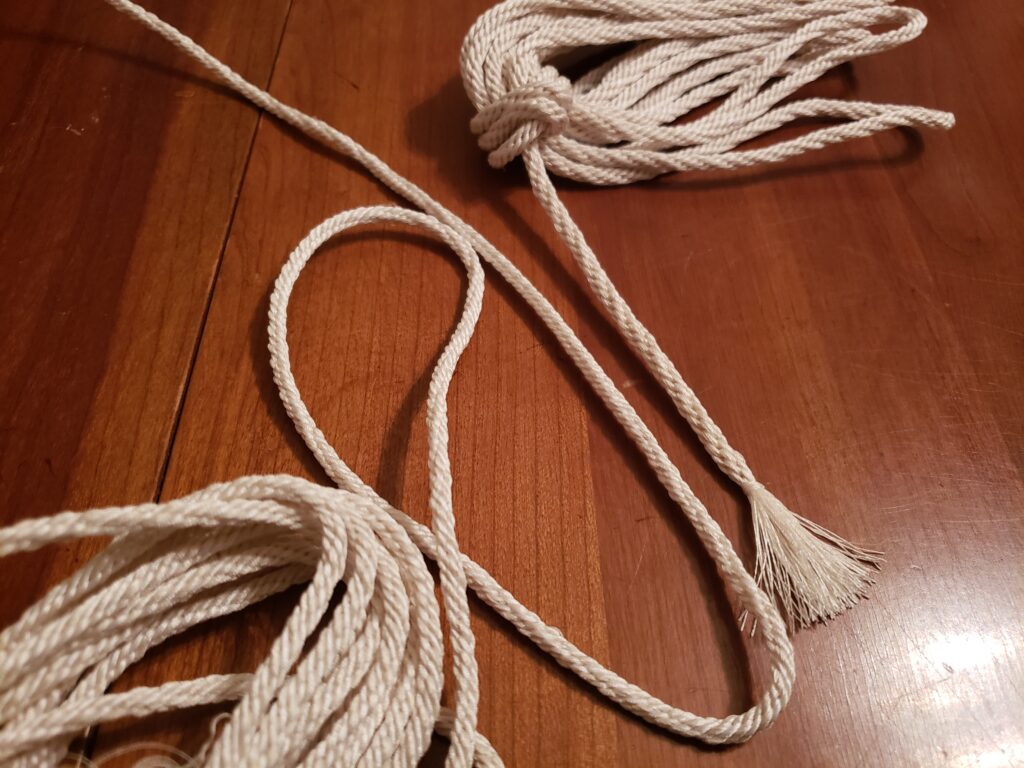
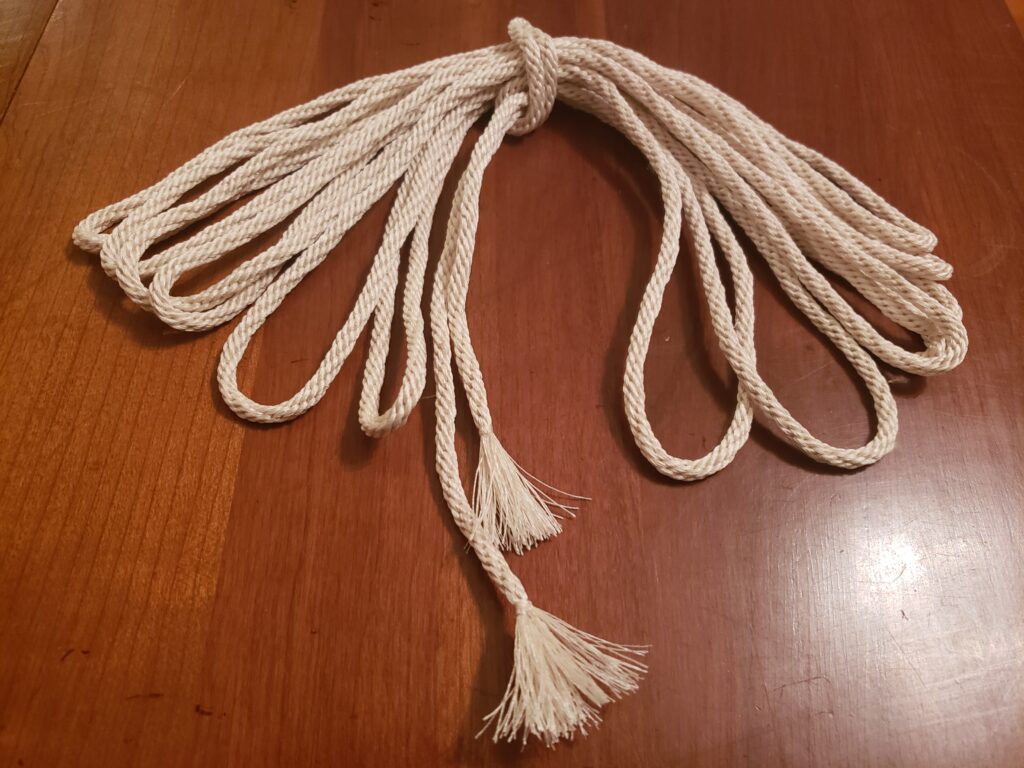
I will need to trim up the kazari-himo, decorative cords. The first came in at 166 inches, second at 174, third at 172 and the fourth finished out at 181 inches. This last cord also finished a bit better than the rest. 4 of 8 strands terminated within an half inch of each other. My overall tension was better. How about that?

The Last of the Thread

It arrived today! My last order of silk thread.

I was a little worried that it wouldn’t show up today and I would be forced to cut out the kosode to maintain daily tangible progress. Research is great, results count. I may be advancing some of my research as I go on this project, but as I said earlier this month, I did my research first.

8 fully wound tama are now sitting on the table next to my marudai.

I need to finish this last kazari-himo (decorative braid) and move on to the flat braid as quickly as I can. To keep up with the production schedule, I need to complete one project every three weeks. Hat, kosode, hitoe, and uwagi (lined, counts as 2). I don’t know if I’ll be entirely finished with the hat by Wednesday night, but I’m going to try.

Time to warp the marudai and set to weaving for a little while before bed…

Curtains

I didn’t feel up to crawling around in the floor cutting up silk today, so I’ve been spending time staring at zoomed in images.

A flat braid with a chevron pattern is visible woven through the sheer fabric. I know that the sleeve ends of hitatare have a flat decorative braid run through them, using either tiny loops or slits in the fabric. Hitatare – a men’s upper body garment with decorative cords at sleeve ends and attached to the collar frequently worn with matching hakama (pleated pants) and one garment in my next big clothing project after C3 so stay tuned for that.

On the other side, still zoomed in, are what appear to be the kazari-himo tied off to the flat braid?

As in they don’t attach to the hat? Oh dear. This is what I get for saying I’m going to finish the accessory layer first. Looks like I need to stitch the individual panels to each other a bit further down as well.

It makes sense to have something hanging over the panels to help hold them down in a light breeze. A built in cord that the decorative cords hang from would absolutely do this well. I’m curious about the sheer fabric holding the weight of the kazari-himo from the flat braid. I have some scrap of the silk gazar I used for the mushi no tareginu. I could do a test. The slits in the fabric are only cut, and at that position would be through 2 layers of fabric, just above the fold over hem. I’d guess that the braid width is about 3/8 inch wide.

Do you know what this means? More silk thread. I can’t order any more, so I’ll have to make do with the extra spool I ordered this last time.

I wish I could just go to Kyoto and look at the thing in person! I may keep the kazari-himo (decorative cords) attached to the hat as the image is a little difficult to make out for sure. The flat braid though…that should happen. I’ve found a chevron braid in one of my kumihimo books already. It’s also an 8 strand. I’ll measure out the finished mushi no tareginu (hat curtains) width, double check it against my hat circumference, and use that as my cord length.

Good news. The completed panels are slightly smaller than the outer circumference of the hat. So they fit and I didn’t screw up when I cut my panels. Hooray! My flat braid needs to be 63 inches long. I’ll aim for 70 inches to be safe. I should have enough thread. I think. The math says I have enough. Fingers crossed.

2 Weeks In

Tonight marks 2 weeks of the Calontir Clothing Challenge.

I’m almost done with my Accessory Layer for C3. I’ve finished up the stitching on the last mushi no tareginu (hat curtains) panel. The 4 panels are also now attached to each other. All that’s left is to fold the top over (potentially stitch it) and attach them to the hat… 3 of 4 decorative cords are complete. 4 tama are wound. More silk thread (a spool more than I need) is on the way.

The silk thread for the uwagi (uppermost garment) lining arrived from Britex. One of the colors will work beautifully. I’m relieved.

Has anyone else noticed that I have deviated from the production schedule? Eh. I can’t remember how in depth I got about it. Well, I’m revisiting that tonight as it is more than obvious that I chose to finish the accessory layer rather than undergarment layer first. Oh well.

Here’s a lovely inspiration image:

Woman in ichime gasa with mushi no tareginu. (A rush hat with a very large brim circumference that has sheer curtains and decorative cords hanging from it.)  at the Jidai Matsuri 2009
Woman in ichime gasa with mushi no tareginu. (veiled hat) at the Jidai Matsuri 2009. Wikicommons

If you look over her shoulder, under the hat, you can see that the mushi no tareginu are folded over at the top. I’m uncertain if the fold over should be stitched down or not, but I don’t see visible stitching on the outside…

Close up image of a mannequin wearing traditional Japanese dress, a travelling outfit.
Travelling Outfit from the Kyoto Costume Museum

This image on the other hand, which is of my reference outfit at the Kyoto Costume Museum, appears to not only have the fold over stitched, but it almost looks like a channel with a cord running through it. But the decorative cords attach to the hat? Is it just a wide hem? Hmm. She’s also wearing one more layer than is labeled on the line drawing. See that cream colored collar? Things to ponder while I wait on supplies and move on to the kososde.

Third Time’s the Charm

Finished reeling silk thread and winding it on tama. By reeling, I mean running thread in a loop between two sawhorses set 248 inches (20′-8″) apart 20 times for each tama. I’ve learned it’s not possible to keep the tension even. (Problem 1) This leads me to believe this would have been done in shorter segments that were then put together. More research is required.

7 wooden spools or tama are lined up on the left of the image with looped ends made up of multiple threads extend to the right. A looped and knotted length of light pink cotton thread runs top to bottom of the image. On the far right is another tama on it's side, empty.
Seven full tama, or weighted spools, A loop of cotton embroidery floss for holding the silk strand on the tama. On the right is one empty tama.

So not only is it impossible to keep the thread tension even while reeling, it’s also impossible to wind the strand onto the tama with even tension. (Problem 2) And as you can see from the above photo, there are also the cut ends to deal with further complicating the tension. (Problem 3)

A white multithreaded strand runs from a looped end on the left to a double row of of wooden spools, top down view. The strand is tied off halfway between the looped end and the spools.
The 8 strands secured together

The looped ends of the strands are tied together with a bit of embroidery floss that is taped down. I pulled the tama taught. The strands were smoothed down and tied together using silk thread. (Problem 4)

The next step is to pass the tied together end through the whole in the center of the top of the marudai. The round top is called a mirror. A small bag containing lead fishing weight (approximately half the weight of all 8 tama combined) is attached via a lark’s head knot to the strand just below where they are all connected together. The tama are then unfurled over the edge of the marudai and secured with a lovely adjustable looped knot. I tend to get two or three of these wrong to start and a tama suddenly drops to the base of the marudai.

A Marudai, or Japanese braiding stand, prepped for weaving. It is a wooden device with disk top and square bottom. The top is held 2 feet above the bottom by 4 wooden dowel legs. A bag of weight hangs from the cord in the center. 8 tama hang over the edge of the mirror/round top of the marudai.
Marudai prepped for weaving. A bag of weight hangs in the center. 8 tama hang over the edge of the mirror/top of the marudai.

I then adjust the height of the tama so that they are all even. Keeping your tama at an even height as you weave is important to maintaining the delicate tension held between the cord weight and the tama. Even tension means an evenly braided cord.

Once the tama are adjusted in height with the proper knot, I adjust the strands around the marudai so the start of the braid is in a neutral position.

And we’re ready to begin kazari-himo number 3.

This is a top down view of a marudai set with 8 strands. we see a round wooden top divided evenly by 8 white strands that join in the center over a hole in the round top.
Top down view of a marudai set with 8 strands.

Problems 1 through 4 mean my cords are not evenly braided. The varying lengths of remnant strands when I finish weaving are a testament to it. And that’s okay. I am not a master of this art. I did my best with the tension. It will result in a perfectly usable cord, just like the last 2 times. And I can only do my best and learn so that maybe next time is better.

New Thread Complications

It is what it is.

4 tama* of old silk thread, 4 tama of new silk thread. I knew there would be a difference. I set them alternating so that the difference in the cord would evenly spiral through it instead of bouncing from side to side creating a zig zag wave in the weave from the variance. I’ve seen how differently weighted and sized strands affect a braid.

I didn’t expect the cord to appear tighter. The new thread is higher quality and smoother than the old, and the resulting braid is more fine. It’s also slightly smaller. Just barely.

Two bundles of white braided cord sit opposite each other bottom left and top right. A segment extends from each bundle creating a diagonal from left to right. The cord on the left is slightly smaller and of finer texture than the cord on the right.
Kazari-himo number two, half new silk thread on the left, number one all old silk thread on the right.

Between a little more weaving last night and some this morning I’ve finished 148 inches. I’ll have the weaving of kazari-himo (decorative cord) number 2 finished tonight. Tomorrow will be for reeling out more silk thread and cutting the kosode.

Speaking of more silk thread…I’ve done the math. Three times, actually. The first time I had just enough thread. The second and third times were just now to double check and then verify that my double check was indeed right. The first time I was wrong. Oops.

I will have to order more thread since the new thread is so much lighter than the old thread requiring more threads per strand. And since I have to order more anyway, I’m going to up the threads per strand to 40. I know that seems like a huge jump, but I totally spaced and called the last set 15 threads per strand when they were really 30. I made 15 loops around the sawhorses. There and back makes 2. Oops. This is why my math was off the first time.

I’ll need 2 more spools. Did I ever say that these spools are 1,090 yards each? Bwahahahaha! Yeah. I’m going through a lot of silk thread.

*I realized tonight I’ve never really explained what tama are. They’re weighted wooden spools or bobbins. Each strand of the braid is wound around one tama, the braid I’m weaving has 8 tama or 8 strands. I’ll take some pictures of my kumihimo “equipment” for a post later this week. I think I should also probably start a glossary to assist my readers…

Documentation First

For the longest time, I considered myself a walking A&S display. I didn’t enter competitions. I’m apprenticed, so (I thought) it was obvious I was “on the path” to Laurel. I taught some classes, did service and shared my art and that felt right for a long time. And then I moved to a different Kingdom. I’ve only been able to attend a handful of events so far. No one here knows my Laurel, and unless they check my wiki, they wouldn’t even know I’m apprenticed. I don’t usually wear a visible green belt. I haven’t run events here. I haven’t held office here. Nothing is obvious. I feel like a person without context. And now, well, there aren’t in person events. I needed a way to share my art and knowledge, a way to show my growth in my chosen discipline.

This pair of competitions, this outfit, all of it, is my first go at A&S competition in the SCA. First go and it’s Kingdom and Inter-Kingdom level. Go big, am I right? Eek!

I wanted to make sure I was as set up for success as possible, after all, I’m really competing with myself. I’ve mentioned my production schedule. That was born out of my research and documentation.

It wasn’t long after discovering the Calontir Clothing Challenge (let’s just call it C3 from now on) and settling on an outfit that I realized I could also enter Crowns A&S Champions (A&S Champs) at essentially the same time. I had already listed each element of the outfit and wrote out an outline of my basic documentation. Using the East Kingdom A&S rubric as a guide, I revisited the outline and laid out what the piece was, what materials I was using to create it, what period references were used for the patterns, how it is done in period and what deviations I am making and why. I’m also adding to these notes as I go so I can include what I learn through the process and how I dealt with challenges and changes in the final version.

I refused to officially enter C3 until I had all that done; entry for A&S Champs is coming up next month. I do enjoy the confidence I have in this project because I had all the groundwork complete before starting. Let’s hope this endeavor can help me create some context in the East Kingdom.

And a weaving progress report: I’m at 78 inches and counting on the second cord. I’m also starting to really feel the repetitive motion in my shoulders.

On a wooden base of a marudai rests white braided cord, coiled in tight loops between the 4 upright wooden dowel legs of the marudai.

Every Day, a Little Progress

8 tama are wound.

I made the switch to the new thread halfway. The new thread is a little lighter and has a different hand. It’s a higher quality thread. I had to increase to 15 threads per strand to achieve a similar, though not exact, strand size to the old thread. I think I’ll use 16 threads for the remaining 2 cords.

I may have to order more thread. I know. I refuse to do the math or even think about it any more today.

I’ll start the braid for cord 2 of 4 tomorrow.

I have panel 3 of 4 prepped and I’m going to settle in to a YouTube playlist and stitch until done.

166 Inches

More than I expected, but that was without the weight change factored in. I couldn’t be more happy with the results.

A looped bundle of white braided cord, kumihimo, with tasseled ends.

I spent many hours weaving today and managed to finish the first of 4 cords to make kazari-himo or “decorative cords” for the hat in my travelling outfit. I tied a couple of overhand knots in it, loosely and held it up to hat brim height. It’s perfect.

Total time on this braid was approximately 13 hours. 2 hours to reel the thread and wind the strands on tama. 10 hours of active weaving and about an hour in set up and take down, tasseling the ends and clearing the leftover silk from the tama. Not bad.

That makes 2 out of 3 items complete for the first 3 week period of my production schedule. Tomorrow I’m going to spend some time working on a kosode pattern and prepping my linen.

Until the new silk thread comes in I intend to get another panel for the mushi no tareginu (curtains for the hat) started. And speaking of thread, I got a payment off to B & T for the reappearing package of linen thread and a thank you for my honesty. I’m glad a lovely merchant is not out any money because a parcel went missing.

Ready to Begin, Again

I really thought I would give the kumihimo a rest and do something else. Nope.

I actually didn’t plan to get much of anything accomplished as I had other priorities today. I didn’t wake up knowing what to do, nor did I happen to do research that illuminated an answer. The fact of the matter is this – there is only so much space in my apartment and I can only move the sawhorses so far apart. So I set them as far apart as I could and measured. 248 inches. That should net 135 finished inches which is lovely and long and has room for knots.

So I set myself to reeling out silk thread and winding tama (wooden bobbins/spools). I was more careful this time and lifted the end loop off and passed a bit of string (DMC floss that had previously been used to attach a strand to a tama) through it.

8 wooden spools with white strands made up of multiple loose threads are arranged in a rough semi-circle The looped ends of the strands extend to the center point of the semicircle and a dark grey string has been passed through the looped ends.

After I had all 8 ready, I cinched the string in a lark’s head knot and taped it down to the table. I then smoothed the cut parts of the ends and bound them all together with needle and (silk) thread. This is a much more tidy start than the …test braid. That looped end will eventually be cut and trimmed to make a tasseled end.

8 wooden spools with white strands made up of multiple threads THe strands are gathered together and bound. Needle and threadextend to the left of the bound spot. The strands have looped ends which have a dark colored string tying them together in a lark's head knot. The dark string is taped to the wooden surface with a piece of masking tape.

It’s nearly midnight and I should really get to bed, but I’m sorely tempted to go ahead and set the tama and start again. I won’t. But I am tempted. And I definitely have to order more silk thread.

Follow by Email
YouTube
YouTube