Overtime Day One

I’m frustrated because I’m taking so long. working in fits and starts. A little bit every day, but still not enough.

Deep breath.

Please, unclench your jaw / Relax your shoulders, gently / Take a slow, deep breath. / How long has it been since you / Last allowed yourself some peace?

Back to it.

I’ve been listening to SCA classes on YouTube while stitching. Today I’ve listened to Introduction to Documentation and How to Research Like an Academic. And I’ve discovered that the East Kingdom’s YouTube channel has some lovely playlists set up, so I’m going to listen to one of those (made up of hours of classes) next. The webministry is doing an amazing job.

I’ve been reassessing my timeline, and I have a few more days before I think things start to get too tight for comfort.

So far today I’ve just about finished the first step, folding over and then using a running stitch to secure the fold. I decided to use that simple method as my seam finish for the sleeves. I’m going to try the “triangle fold” method from the pattern instructions for the okumi seams. I think I understand it now.

Deep breath. And back to it.

Sode and Determination

The tech issues persisted into today. And it has me a little worn out. But it seems that I’ve found a work around in third party software. Or not. What seemed to be a fix has let me down. I’ll keep working on it.

Last night I did indeed finish hemming the openings.

While working on other things today I was doing a lot of thought about the eri, collar.

A quick aside. I use the Japanese terms because that’s the word that pops into my head first when thinking of the item. I don’t know much Japanese, but there are certain things, like the names of parts of garments and a handful of colors that Japanese is the first language I think in. I’ve been studying Heian clothing for almost two decades. Is it any wonder some of the information is so rooted in my brain that I see fall colors and immediately think of the names of kasane, color combinations?

Anywho…

I’ve been wondering about the collar and the excess material at the top of the migoro, body, and okumi, overlap panel. In modern kimono the excess is folded up and encased in the collar. I have no reason to stray from the modern practice. I’ve cut it off in the past. Many recreationists add interfacing to their collars to make them crisp. I never have. I didn’t see anything in the translations so far to indicate use of a stiffener. So I’m not changing on that one. My biggest decision is how deep to cut the slit at the shoulder fold/neck opening. I’ll consult the patterns again and make a choice.

But later. Today is for finishing sleeves. Which means I have to come to a decision about seam finishes. So. Unless I cut into the seam allowance, folding over and felling down (or at least putting a running stitch through the fold), away from the seam on each side is the only way with the sleeves.

I’ll need to finish the seams on the body before I attach the collar and finish the hem. It’s getting so close to done but there’s still so much to do.

Why would you put off / Until later what you have / Had all day to do? / Does the pressure compel you / As the deadline approaches?

Sewing Sode

It’s sleeve day!

First thing is to decide on the final size of the sode, sleeves. I’ve looked through the patterns that I’m referencing again, and it didn’t help. Well, it helped, I just wasn’t presented with an easy answer.

The men’s hitoe is too big. The other men’s garment has a completely different style of sleeve. The women’s hitoe has 74cm (29 inches) sleeves. I also looked at the pattern for a later period uchikake, a fancy outer-wear garment that the kosode evolved into, sort of. Those sleeves were remarkably different being half panel width and much more short, only 44.5cm (17.5 inches). Some patterns made by modern recreationists are as short as 15 inches.

I went with something in between. 20 inches. Bigger than the later period and using a full panel width, but not so big as to even completely fill up the hitoe sleeve that will go over it. It’s the size that to my eye gives an appropriately imposing period proportion.

I’ve finished sewing the bottom and front edge seam on both sleeves so far. I plan to fold over the opening for the hand and hem it down on each one next. I’ll probably get that done before I turn in to a pumpkin.

I’d love to include some more progress photos, but I’m experiencing technical difficulties migrating photos and video from my phone to the computer. Here’s hoping I resolve those issues soon.

And I spent a little time on the beach today. It was quite windy.

Rivulets of sand / Hurried by unrelenting / Wind across the beach / The unseen makes itself known / And rushes into the sea

Once I have the sleeve openings hemmed I’ll attach the sleeves to the body of the kosode at the shoulder. I’ll then hem the body side of the sleeve and double check that I sewed the side seam up high enough – I may have gotten a little off when converting centimeters to inches.

And I still have to figure out seam treatments.

I definitely will not be finished with it tomorrow, but most likely in a day or two of my target deadline and that’s not too bad.

Attaching the Okumi

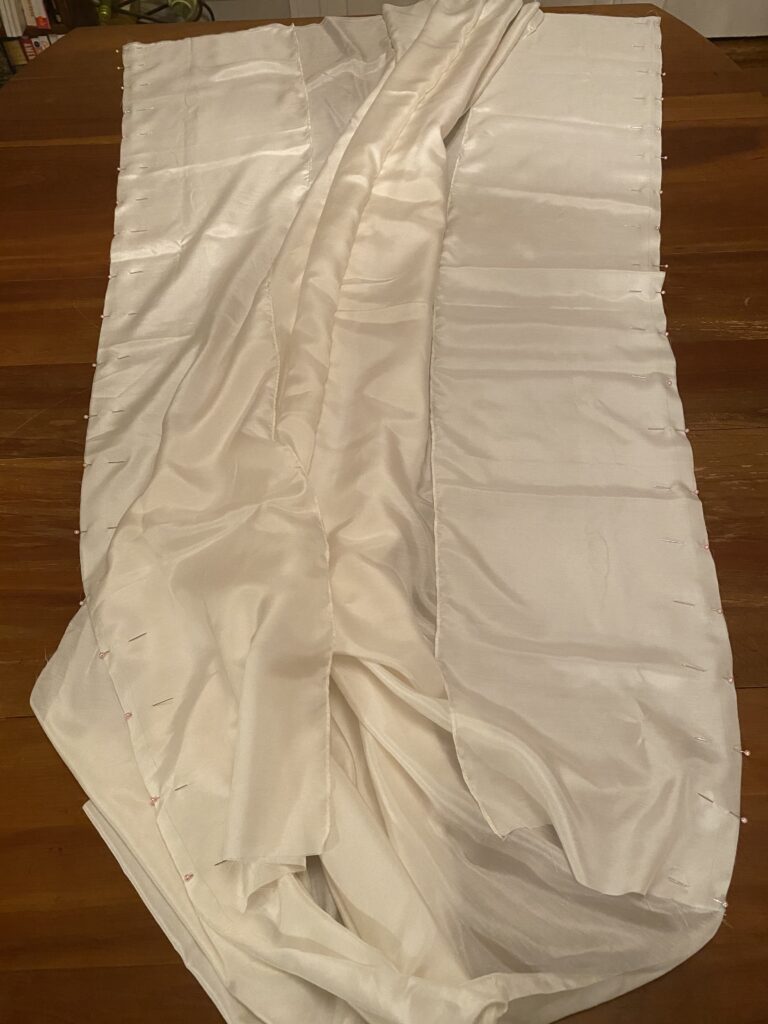
Today feels really productive. I cut down the okumi, overlap panels, cut open the migoro, body panels, and pinned everything together.

White fabric lays across a wooden table. The outside edges of the fabric are each studded with pink-headed straight pine.

Stitching the okumi on to the migoro is progressing nicely, and I’ll likely finish before I go to bed. That should probably read I won’t go to bed until I finish.

I’ve been thinking about all the kosode I’ve made. This one is almost the same, but so far, the differences are immense.

The fabric choice. I’ve made kosode from multiple weights of cotton and linen. Nothing compares to how fine working with the silk is. I’m sitting with the majority of the garment in my lap while stitching and it’s just so light and folds down so small.

Stitching. It is taking eons longer to sew by hand than it did by machine. My seams are just as straight. The machine has more precision in stitch length. But my little running stitches don’t randomly produce bobbin vomit (this is when the bottom or bobbin thread on the machine gets loopy and becomes this awful mass of thread). I’m also enjoying sewing by hand for the sheer lack of noise. Sewing machines are loud. Tension is a toss up between the two.

A different take / On a tune I heard before / Once upon a time / Meter and rhyme – changed, but / This feeling has the same score.

Okumi Today, Okumi Tomorrow

It was already / Later than I had hoped / And my muse spoke not / I let the silence whisper / Inspiration in her stead

Finally.

I finished hemming the second okumi, overlap panel, tonight. I expect things to start to progress rapidly from here. This step was a time sink. Yet another reason to try not to ever do it again.

Hindsight being 20/20, I’ve already figured out how I could have avoided hemming the okumi during layout this time. Not super helpful until I make another kosode with the same width fabric. The next garment, the hitoe, needs selvage edges for the sleeves and the overlap panels in order to avoid hemming work.

And I still haven’t settled on how to finish the seams.

Tomorrow I’ll start in on the steps I outlined for the okumi attachment in yesterday’s post.

Okumi Blues

I’m still working on hemming the okumi (overlap panels).

Warm days in autumn / Are a gentle reminder / Of summer now gone / Thoughts to brace against the cold / As we move toward winter

Progress is progress and I have at least finished one of the okumi.

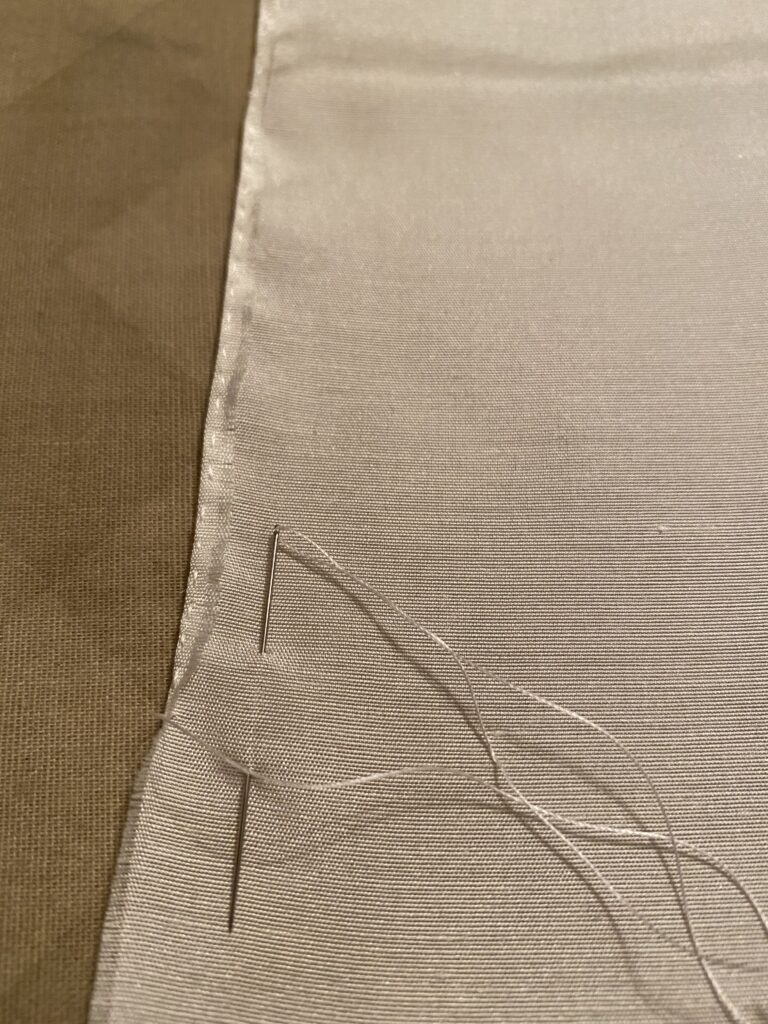
Here’s what I’m doing. First I fold the edge over about 1/16 inch. I put a running stitch through that to hold it down, approximately 8 stitches per inch.

The edge of the white silk fabric has been folded over 1/16 inch and secured with a running stitch. A needle threaded with white thread is woven through the fabric.

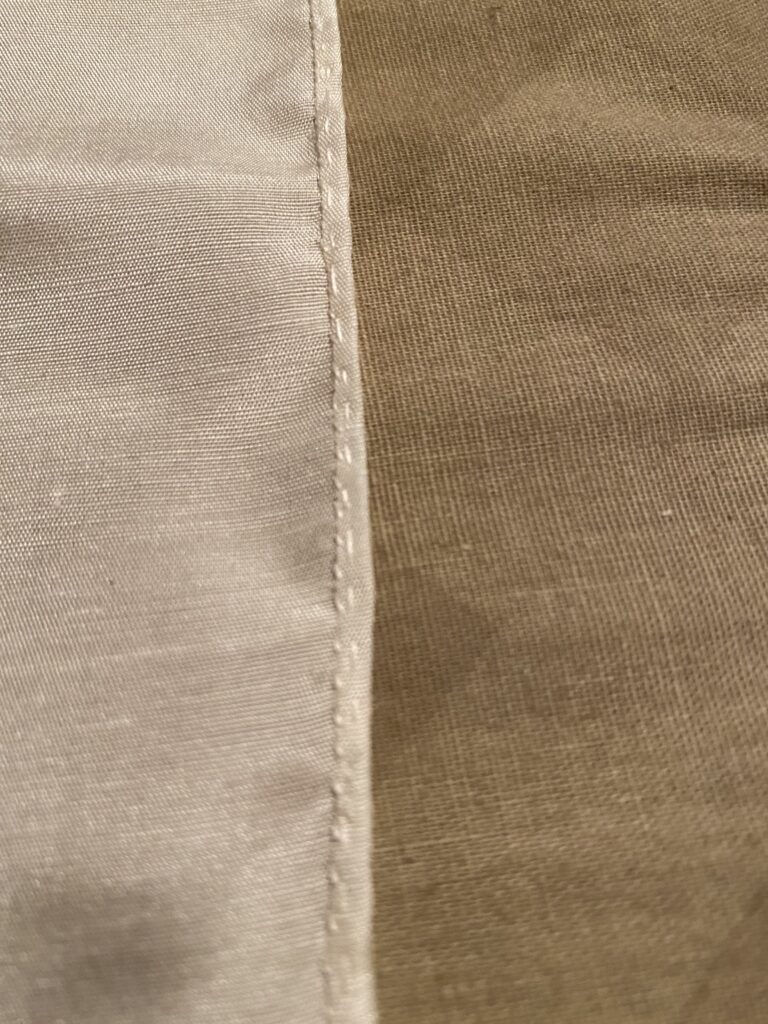
After I’ve run a line of stitching down one side, I fold it over again and secure it with a felling or whip stitch at approximately 10 stiches per inch.

A rolled hem on white silk fabric.

Once I finish the second okumi, I’ll slice the migoro (body) open along the front -if you recall, I left the two body panels in one piece. I’ll then cut the unhemmed long edge of the okumi at an angle. That angle is then sewn to the migoro body panel.

I’m not sure if I’ll attach the eri (collar) after that or the sode (sleeves). Time will tell.

Right now it’s time to get back to hemming.

Idle hands

Held my breath so long / I almost forgot to breathe / But was reminded / Gently, to relax again / After an eternity

For almost a full day, I didn’t sew.

And now I’m actually concerned about my pace. Maybe I just need to really settle in to it. I feel like I keep saying that. It was also a tremendously stressful week. I feel like I keep saying that as well.

Time to buckle down and start making serious progress. Am I repeating myself with that too?

I have made good progress this evening. I’ve almost finished hemming the edge of one of the okumi overlap panels. I should keep in mind that I won’t have to do this again on the other two garments. Lesson learned about cutting particular pieces on the selvage edge.

And hey, that’s one full week of poems for the #tankachallenge. Actually proud of that.

Constructing a Kosode

One of the fun parts of Japanese costuming is once you get the basic idea in your head of how to construct a garment, you are essentially prepared to make the majority of top of the body (hangs from the shoulders) garments. Kosode, hitoe, ginu, uchigi, uwagi, hitatare – you can build them all! Bonus- all of these garments are also incredibly similar in construction to the modern kimono.

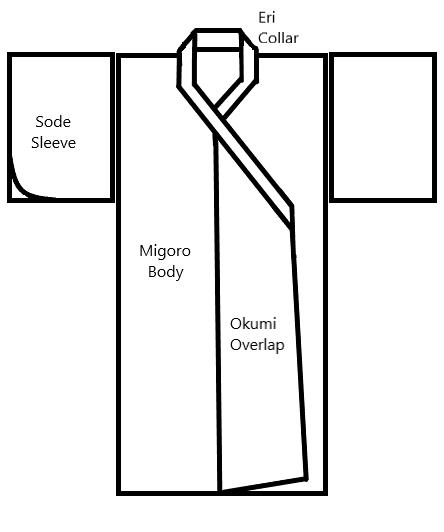
Here is a basic front view diagram of a top of body Japanese garment:

A simple geometric line drawing or diagram of a Japanese garment. A large rectangle with two smaller rectangles either side of the larger rectangle's top making a capital "t".There is a section in the top middle of the large rectangle shaped like a backwards nine extending to just above the middle of the rectangle labeled, eri, collar. The small rectangle on the left is labeled sode, sleeve. Half of the large rectangle has the label migoro, body, and atached to the bottom angle of the eri and the migoro is a 4 sided shape labeled okumi, overlap.

That image should make it easier to visualize the kosode that is being worked on.

So you might have noticed that one of the sode (sleeves) has a curved line in the bottom outside corner. That’s because I’m not sure if it should be curved or straight. The kosode is called that because of the sleeve, ko meaning small and sode, sleeve. Small refers to the opening of the sleeve. Unlike the other women’s garments of the Heian period that layer on top, the kosode sleeve is sewn shut for most of the front/outside edge.

Another diagram:

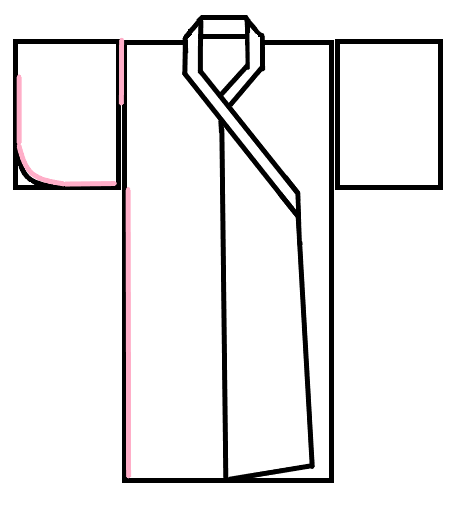
The same diagram as above but without labels. on the left side of the image, the shoulder seam are, most of the outside and bottom edge of the sleeve and the side seam from the bottom edge of the sleeve to the hem are highlighted in pink.

The pink lines represent stitching. The sleeve is sewn closed at the bottom and front, leaving an opening big enough for the hand to slip through. The sleeve is attached at the shoulder, but is not completely attached to the body of the garment. This creates a “swinging sleeve”. The back of the sleeve nearest the body and a section of the side seam are both left open.

Back to the sleeve corner…In later periods the kosode becomes an outer garment and is, in my opinion, the direct ancestor of the kimono. And it has rounded sleeve corners. But I have no idea when the sleeve went from a stitched bottom and outside edge to having a gentle curve in the corner. It’s a natural progression from a construction standpoint. And I’m strongly leaning toward rounding the corners of my sleeves.

Sewing progress-wise I’m hemming the okumi.

And the tanka for today:

I’ve watched your colors / Change and deepen over time / Yellow, now gold and / The festive frock of autumn / Dances with wind on the lawn.

Side Seams Complete

I wanted to write  / A clever pun about tea, / But grief consumes me. / Will tears dilute this bitter / Drink I’ve left to steep too long?

Today hurt. Last day at my dream job. There hasn’t been room for much besides grief.

I made a good deal of progress last night after my update. I stayed up much too late, but the left side seam is now complete. Things went much more quickly after I decreased the stitches per inch back to where they were supposed to be.

I’ve been stewing today over next steps. At this point in the process I can either attach the sode (sleeves) or the okumi (overlap panels). I’ll likely stitch the sleeves into shape while I think about it. I’m wishing I had decided to cut the okumi on the selvage edge so I wouldn’t have to hem them. That’s another thing I can do while I decide between sleeves and overlap panels. And I’ll make sure to cut the next two garments with okumi on selvage edges.

Side Seams and Suspense

Watching colors change / Is an honored fall pass time / I did not expect / To hold my breath for so long / While waiting for leaves to drop

I finished the right side seam. That felt like an uncomfortably long 40 inches. And I need to step up the pace.

Granted, tomorrow is my last day of work, so my “distractions” will become quite limited.

Or maybe I need to be more careful about my stitches per inch.

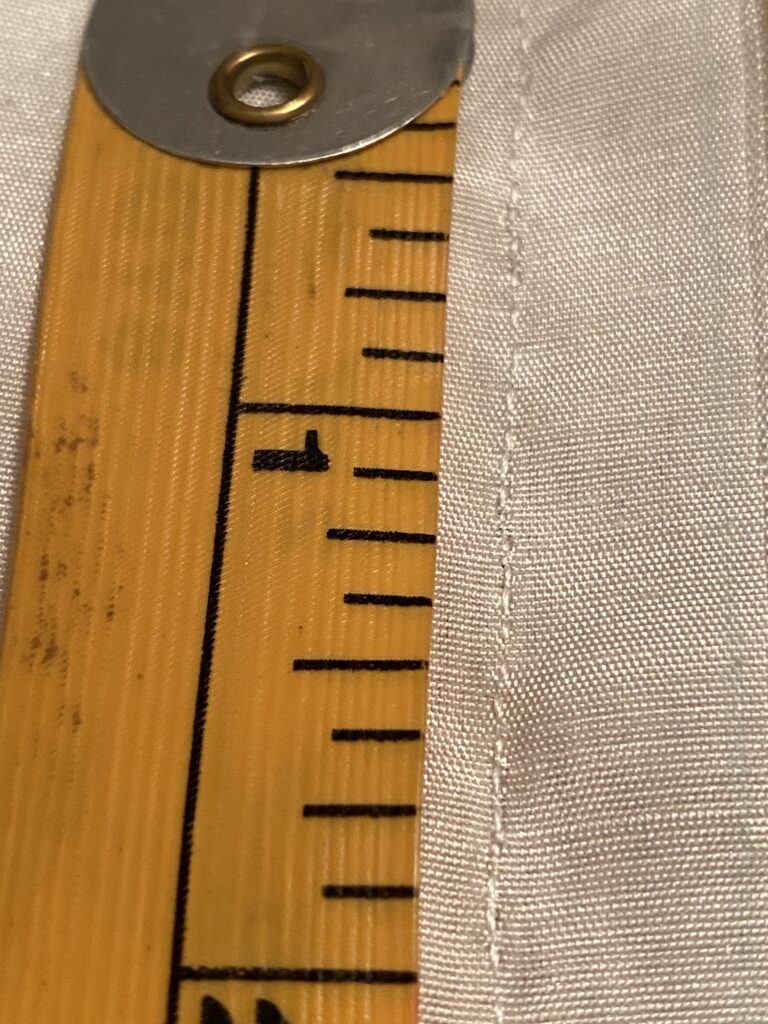
The first two inches of a yellow measuring tape next to a handsewn seam of approximately 20 stitches per inch.

Somehow I got things turned about and was back at about 20 stitches per inch. I need to be more careful. Lets see if I can get back in the right range on the left side seam.

The best part about the left seam is that it is all selvage edge. I still need to decide how I want to finish the right side seam as it is a cut edge.

Follow by Email
YouTube
YouTube