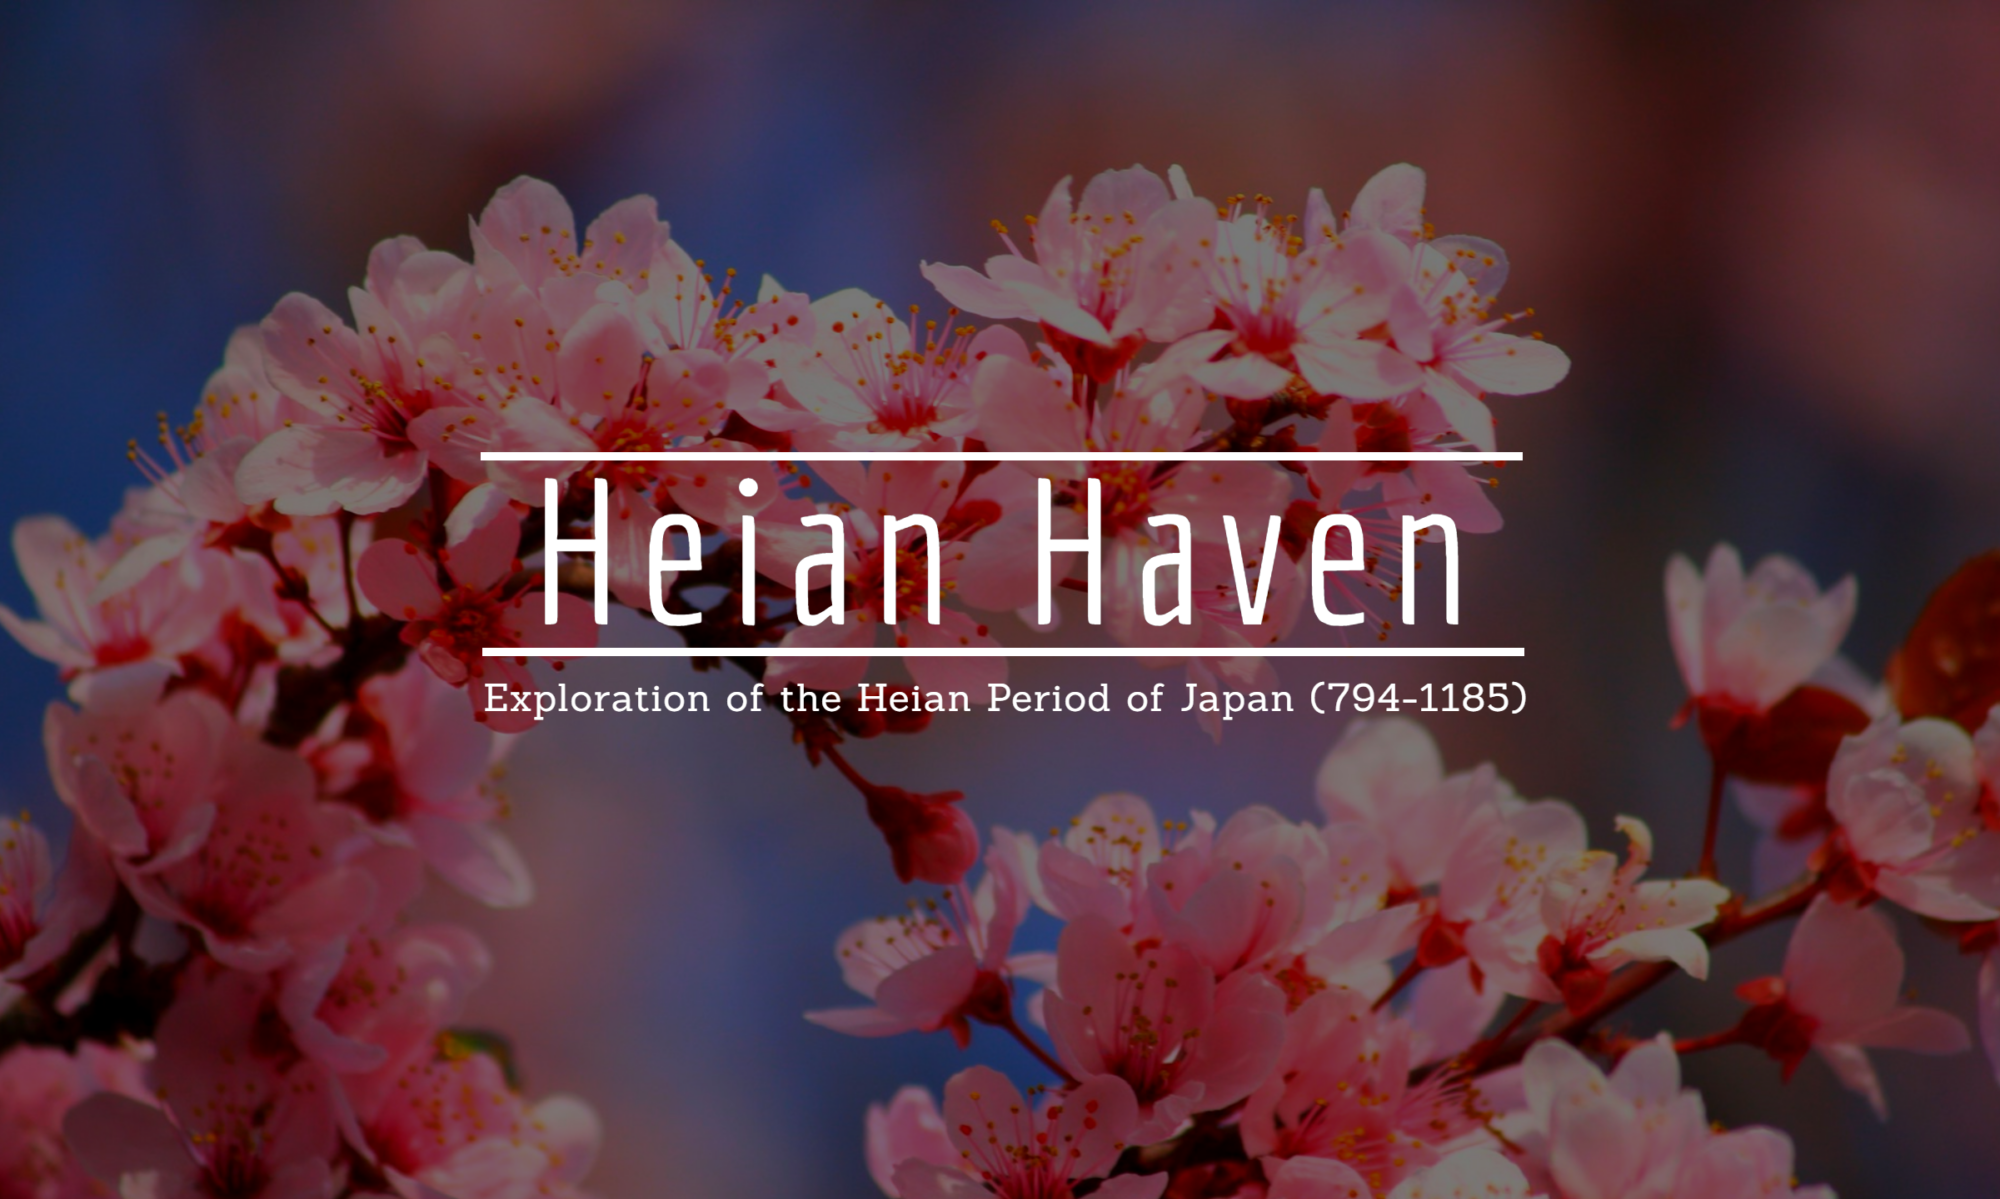
I’ve been working on stitching down the overlap of the mushi no tareginu (hat curtains).
It’s taking forever. There’s something about the silk gazar fabric that just wears on the thread. I’ve had to cut out knots. Multiple times. The thread actually un-twists itself by the end. So I have to go super slow. This thread is 3 ply.
I had to know. I looked it up. It’s the weave. Gazar is woven with twisted thread. Twists mean texture, this texture is abrasive. Just a little.
I’m using a tiny felling stitch. Like super tiny.
They’re invisible at arms length. Tiny stitches take time. Lucky for me the garments go together with running stitch (which I’m much faster at) and I don’t have to use stitches this fine in many places. Mostly just this one 64 inch seam. Halfway there…
Finally finished ironing down the fold on the migoro (body panel) for the false back seam of the kosode. It wouldn’t have taken so long if I wasn’t filming it.
Yeah, it’s a kind of weird thing to film, but I’m also working on documenting this project via video. I needed (wanted) the small shot of it being ironed. 20 minutes of set up for a one minute clip. I hope to be able to find the time to edit along the way, but if I end up doing all the video editing at the very end, so be it.
A thing I need to work on is not postponing work on a piece of the project because I needed (wanted) to film and have lost the light. I had other things to do, but it’s something I just want to be careful about.
If anyone is wondering what I’m going to do with the flat braid, I’ll shift it to the next project as it is perfect for the sleeve ties on a hitatare kamishimo (men’s outfit in which the top, called a hitatare matches the hakama or pleated trousers). I’ll have to order more silk thread to weave a matching cord and the round cords for the chest ties, but that’s a problem for late January/early February.
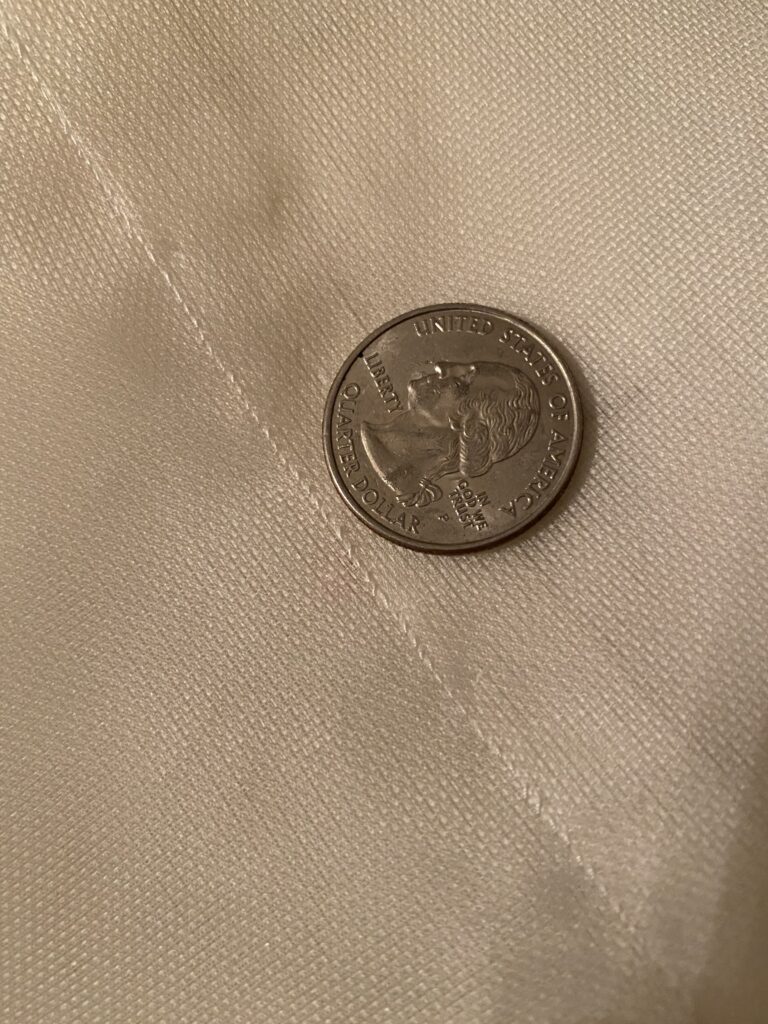
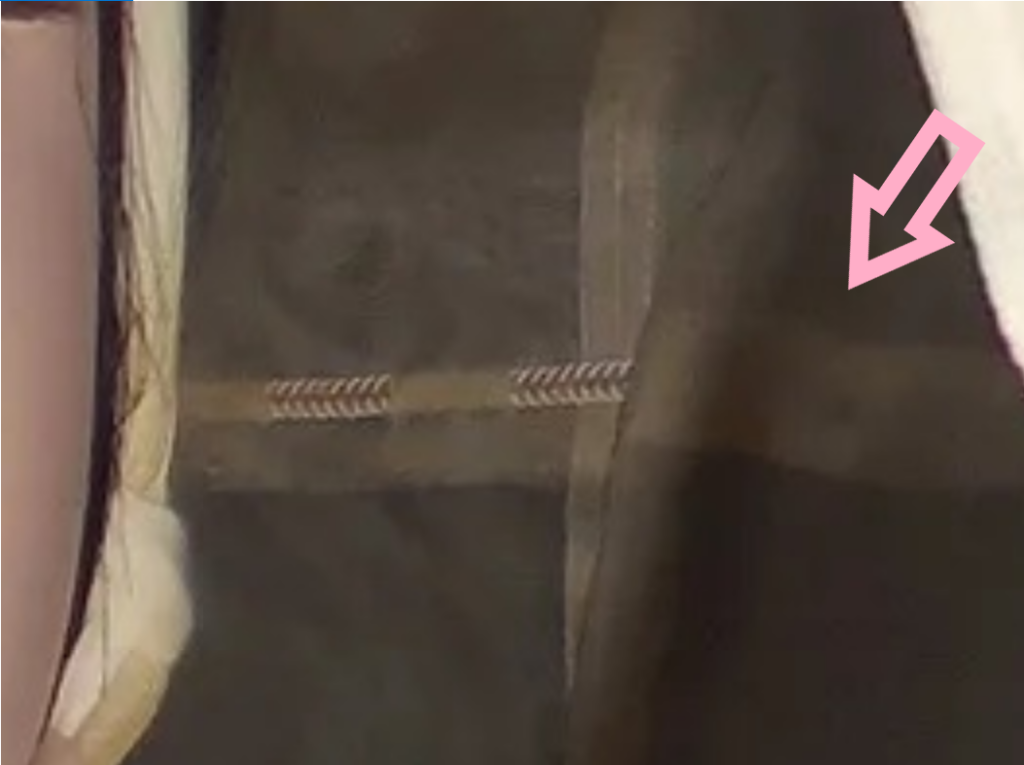
With respect to weaving the kazari-himo (decorative cords) through the mushi no tareginu (curtains), I was able to see in the super zoomed in photo that the cords overlay the seam that joins panels together.
Circle indicates where cord(s) pass over the seam. This is on the inside of the mushi no tareginu (curtains).
So I’ll make sure to have the weaving pop out at the right place, and I’ll join the cords together with a few stitches. It’ll be historically adequate. I still feel good about it. I am curious as to why I don’t see cords woven through above the folded down seam in this part of the image though
Arrow points to the lack of visible cord
This is why it’s historically adequate and not historically accurate. I’m doing my best with zoomed in images.
I did a quick google search to find more images and hit a near jack pot. I’ve done the same search before, but was looking for copyright free images that time.
They are most definitely NOT attached to the hat. I don’t care what the line drawing has on it. The line drawing is wrong.
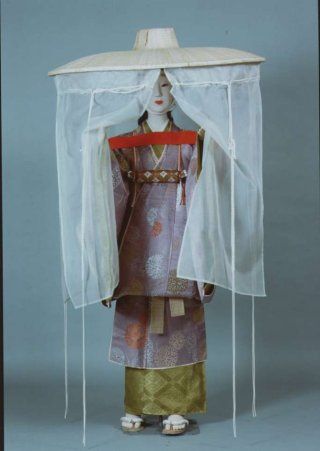
Woman in travelling outfit with ichime gasa
The kazari-himo (decorative cords) are woven through the panel, popping out at the halfway mark.
This image also lets me see the lady’s obi poking out beneath the fold of the garments, so we know the knot is tied in front. The kake-mamori amulet case, the rolled item around her neck beneath the kake-obi the red belt across her shoulders is worn under the kake-obi. You can see the cords that the kake-mamori is hanging from passing under the red.
We can also see that pattern matching on the garments is not a thing. This isn’t to say that it wasn’t done, just that it is acceptable to not. This makes me happy.
And while we’re picking this image apart, I’m confused by her feet. Where are her tabi socks? Was it really appropriate to wear zori (shoes) without tabi?
So now my question is – how do I best recreate what I’m seeing in this image? What I thought was a chevron pattern in a flat braid is likely two pieces of round braid. There is a little bit of a loop on the left hand side, so I’m confident enough in the two round braid idea. It also explains the weirdness I was seeing on the left hand side of my super zoomed in shot.
My first idea is to lay out the cord like the outline of a capital “T”. The arms of the T would be loops. Each panel gets a cord woven though it like that. The tips of the T arm loops will be tacked down to the panel.
I feel good about this plan. Like good enough to cut little slits in finished panels kind of good.
I also think this image will serve as my main presentation image. A side by side with it and me in the finished outfit in the same pose will look fabulous. The side by side was a bit of advice from a commenter on my first A&S display in September.
Hooray for finding just what you need on the internet!
When I brought myself around to working on this project today, I wasn’t in the mood to sew. I decided to go over my research and documentation.
And I found purpose in my presentation script.
I intend to record a video, wearing the completed outfit, giving an overview of the project and how it was accomplished. A 3 minute overview. Or something like that. It’ll be part of my submission of things for A&S Champs in early January. It’s currently about 2 minutes, but we’re only on the second draft. Updating will need to happen as I move through the creation process. And it’s not like 3 minutes is something specific, I just figure I can get most of the information across in about 3 pages of text which works out to about 3 minutes of talking. I will limit myself to five minutes though.
I was taking note while writing out the script where I will need to insert citations for my final documentation. It’s going to be tedious to hunt down sources for some of the information. There are so many things that I know but have forgotten where I picked them up. Common knowledge things should be relatively easy to pin down. Just tedious.
This is me trying to put to good use the ideas presented in the class I took. And desperately trying to feel productive on a day when I could barely be bothered… I’ll try to spread out my documentation sessions and save them for when I’m unmotivated for sewing.
And no matter what else, it’s more progress than I had yesterday, and that’s a win.
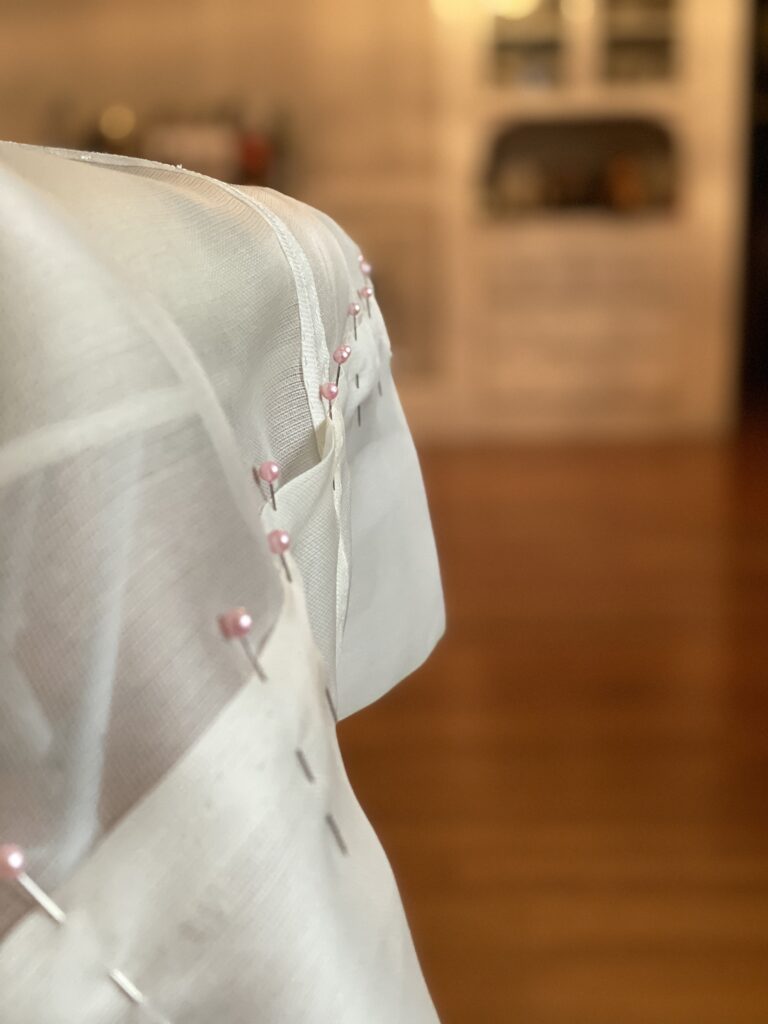
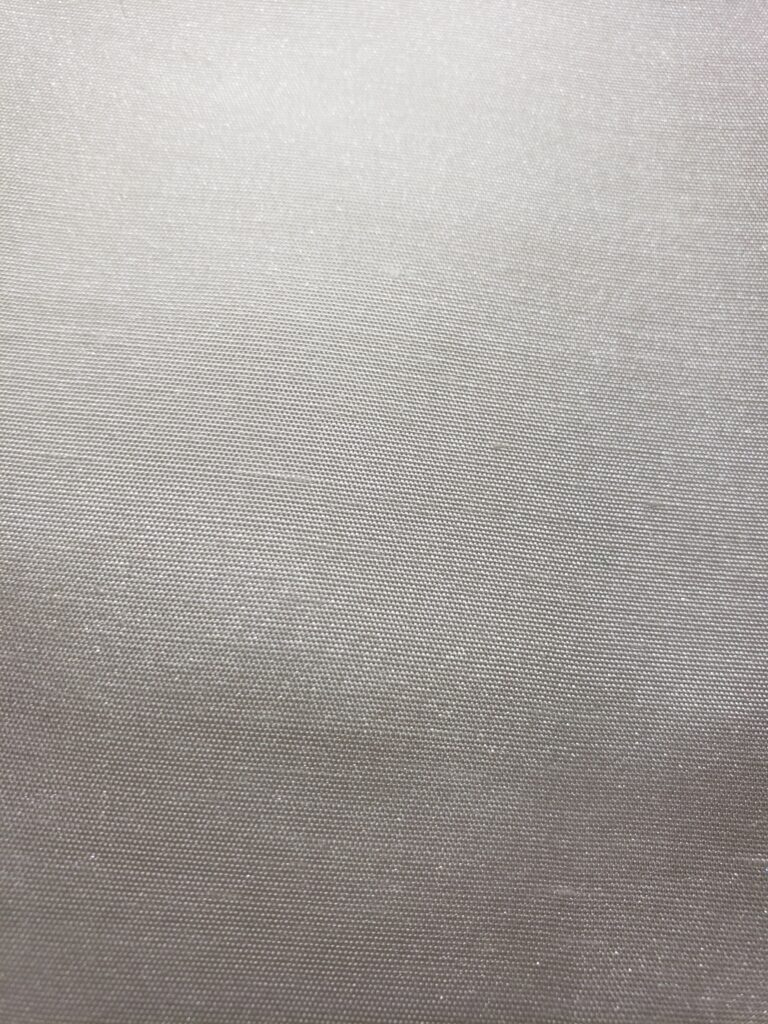
This silk. Oh my. It’s so luxurious. Lucky me to get this as my next-to-skin layer! I’m so glad I didn’t have enough linen! It’s like a heavy habotai, but not quite as smooth. It has a distinct lined texture, very fine, ribbed? But it’s definitely a plain weave. It makes me think of tussah/wild silk. That may be what it is. It’s also just ever so lightly slubby. Not like those huge awful slubs in dupioni, they’re very fine, only noticeable with the fabric at less than 12 inches and more of a double thick thread in the weave than a slub.
White silk for kosode
My cuts are not perfect. Hard to be perfect in the floor. But it’s my best effort and that’s what counts to me. I did not cut the eri, collar piece(s) individually, nor make the diagonal cuts for the okumi, overlap panels. Silk has a tendency to fray something awful, so I’ve left those cuts undone for now. I also haven’t made the cut to separate the migoro, body panels, from each other. I don’t plan to separate them fully. I intend to deploy a false seam for the back seam.
Here’s what I mean – I currently have the two migoro/body panels in one large rectangle. I’m going to fold it in half lengthwise along the “cut line”. I’ll then sew it up halfway with the normal seam allowance. After this seam is sewn I’ll cut on the line separating the non sewn half of the garment. This is the front opening of the garment, and the stitched part is the back seam which I don’t have to finish! It’s not historically accurate, but I already have to cut entire panels from larger cloth instead of cutting the right length panel off a narrow bolt. Finishing the seams wasn’t necessary in period because the edges were mostly selvage. The fewer seams I have to finish the better, and I’ll have a lot of really long seams.
It was late last night and I still needed to decide on the panel width… I resolved myself to pulling out my most recent kodode for an on the body decision. But in the morning.
The plan was the same as before – sweep and mop the floor, iron the silk, throw the silk in the floor, mark and cut. After the panel decision, of course.
About that. I pulled out my newest kosode and measured it. First, it’s a touch too long, so I’ll need to hem it at some point. Luckily, the amount it needs to be hemmed works out to what I decided as the body length of the garment. Yay! Second, the sleeves are actually shorter than I had drafted. Another tiny win! And the big deal, the panel width? This kosode is more than roomy enough, definitely gives the wide silhouette that Heian is all about, I know it looks great under all the layers, as I’ve worn it (once, maybe twice) and all with a panel width of 14.5 inches. Huzzah!
Now, I’m doing historical beginner for C3 and want to be as “historically accurate” as possible for Crowns A&S, so “looking right” only gets me so far. I know that I’ve read in many places that the panel width/loomed width of fabric within the Heian period was 16-18 inches. So I may cut at 16 inches to be more accurate and take a wider seam allowance. Even though I’d rather not. And I can document narrower looms. Hmm…
And, once again, other things got in the way, and I did not cut into the fabric. At least I’ve decided on a 16 inch panel width.
I also attended a class, Capturing Your A&S Process for Competition or Display. I hope to incorporate the concepts into my presentations of the completed travelling outfit.
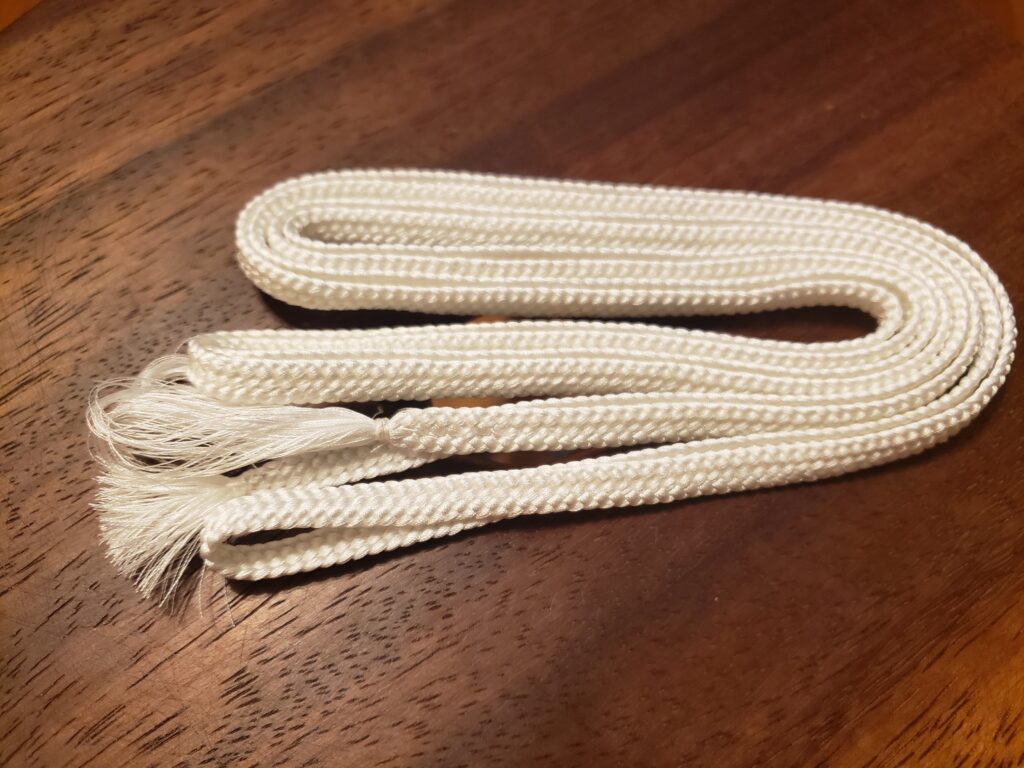
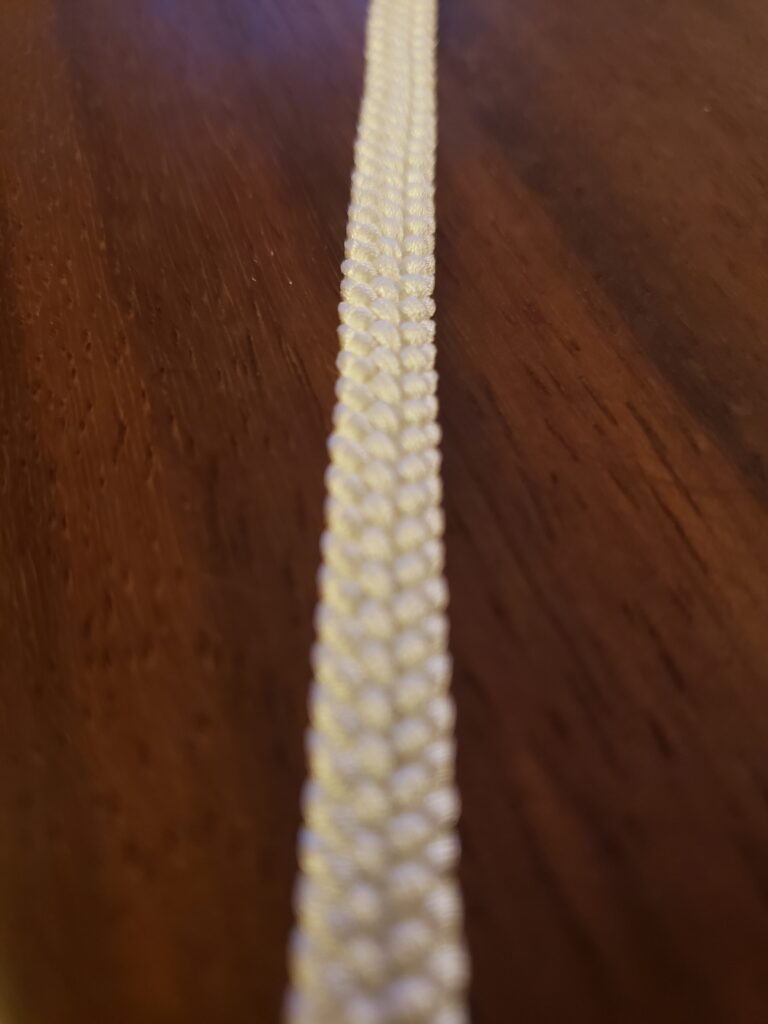
I really thought the flat braid would take a little longer to complete. I knew I’d finish it today, but I thought it would have taken another couple hours. Sometimes it’s pleasant to be wrong.
It finished out at 78 inches, so will need cutting down. You may notice that it looks a little bit like a shoelace.
Finished flat braid
The components for the hat are now complete.
I need to fold over the top edge of the mushi no tareginu and stitch it. The kazari-himo (deocrative cords) need to be tidied up in length, though I could simply tie them up…
Next is whether or not to cut the slits to weave the flat braid through the “curtains.” I’m torn on this. As much as the idea of experimental archeology excites me, I’m just not convinced I have quite enough research to move forward. Research, ha! I have one highly zoomed in photo. I have no idea how it is secured on either end. I know something was woven through though, at least in this example. All of the other images have no indication of a flat braid, or anything for that matter, woven through. But they are all slightly later period (past 1200 or so).
After that difficult decision, the mushi no tareginu and kazari-himo will be attached to the hat. I’ll consult a Chinese decorative knot book and tie up the cords in the large loops shown in the Costume Museum image.
I’m going to sit on most of that though and let the question about the flat braid percolate. Maybe I’ll see if I can find any other images…
The math said I would need 100 inch strands to get 70 inches of braided cord. I only need 64 inches. I did the math twice more to be sure. And I still erred on the side of caution and set the sawhorses at 110 inches apart. I would rather cut the cord down than find I’m short of the mark.
I’m still a little conflicted about weaving this cord through the mushi no tareginu (hat curtains). Making those slits in the finished fabric wigs me out possibly more than the first snip into expensive fabric because these panels are now complete. If I mess them up, I have to start over, and I don’t have the time or money to do that.
Enough thinking. Now, we weave!
And there are early results.
8 strand flat braid.
It’s a little too narrow. Only 1/4 inch, I had wanted 3/8. I wanted to increase the threads per strand as I was afraid it would be too narrow, but I did not have enough silk (or anything else for that matter). It doesn’t have the exact chevron pattern from the blown up image. It is however, the best I can do without further research. 17 inches and counting…
One of the reasons I leapt into the Calontir Clothing Challenge was to give me something to focus on other than my grief. I had just lost my darling animal companion, a yellow fronted amazon parrot named Loretto. He was my world.
And now I find myself thrust into the position of shoving more grief onto this project. I’ve lost a job I love, the best I’ve ever had. My industry is dying. Theatre as we knew it is in a death scene. So I’m also mourning my career to some extent. Maybe things will be better after the pandemic. If theatre comes back, the job I love might be mine again. There is a tiny glimmer of hope.
And I’m going to cling to that and keep working on this project. I know it’s a lot to put on a project, but here we are.
I stayed up way too late last night weaving, so this morning I started at 83 inches. I’m not kidding around about throwing myself into this project.
I’ve been dealing with what seem to be more tension issues with individual threads within strands being off. The finished product doesn’t appear to have been affected. I did top out at a blazing 37 inches per hour. I certainly feel it in my shoulders.
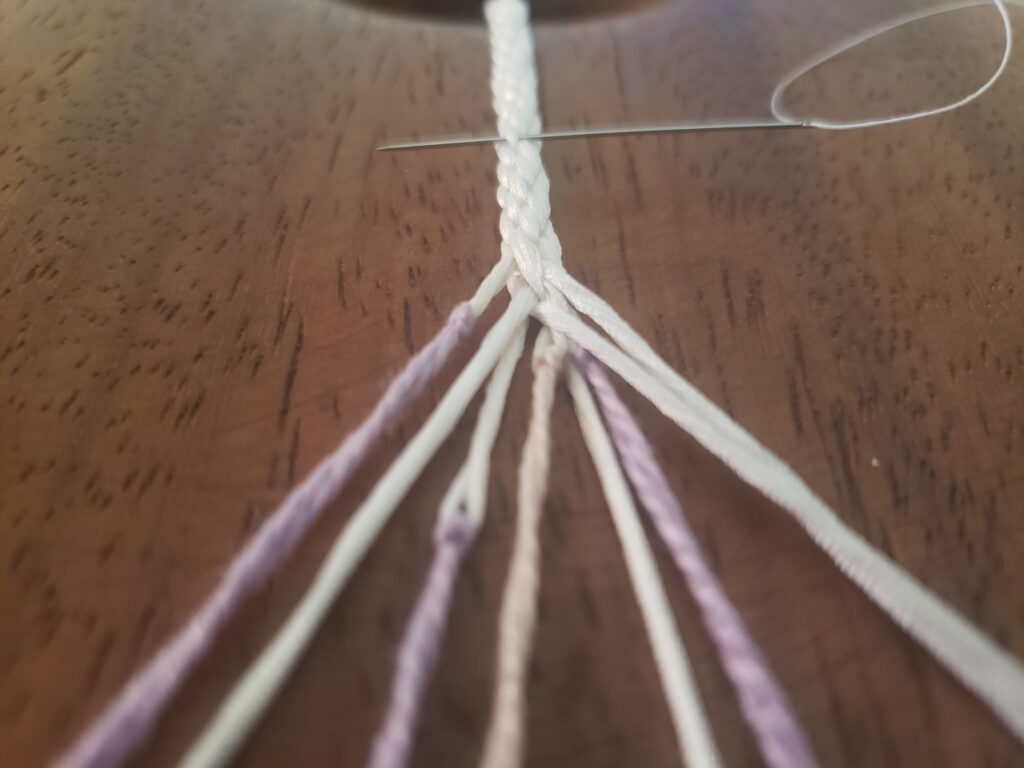
I will need to trim up the kazari-himo, decorative cords. The first came in at 166 inches, second at 174, third at 172 and the fourth finished out at 181 inches. This last cord also finished a bit better than the rest. 4 of 8 strands terminated within an half inch of each other. My overall tension was better. How about that?
I was a little worried that it wouldn’t show up today and I would be forced to cut out the kosode to maintain daily tangible progress. Research is great, results count. I may be advancing some of my research as I go on this project, but as I said earlier this month, I did my research first.
8 fully wound tama are now sitting on the table next to my marudai.
I need to finish this last kazari-himo (decorative braid) and move on to the flat braid as quickly as I can. To keep up with the production schedule, I need to complete one project every three weeks. Hat, kosode, hitoe, and uwagi (lined, counts as 2). I don’t know if I’ll be entirely finished with the hat by Wednesday night, but I’m going to try.
Time to warp the marudai and set to weaving for a little while before bed…