What to do with the Genji Project

This is something I’ve been wondering about, contemplating, for quite a while. Now that I’m halfway through I think it’s prudent to make a plan for the end. How do I break down a multi-year project into a 5 minute video presentation? Yes, that’s my intention. I want to either display or enter this project in Kingdom A&S Champs when it’s done in 2028. Not sure which. It may be bad form to try for the position again, and I should just display. I’ll seek advice on that when the time comes.

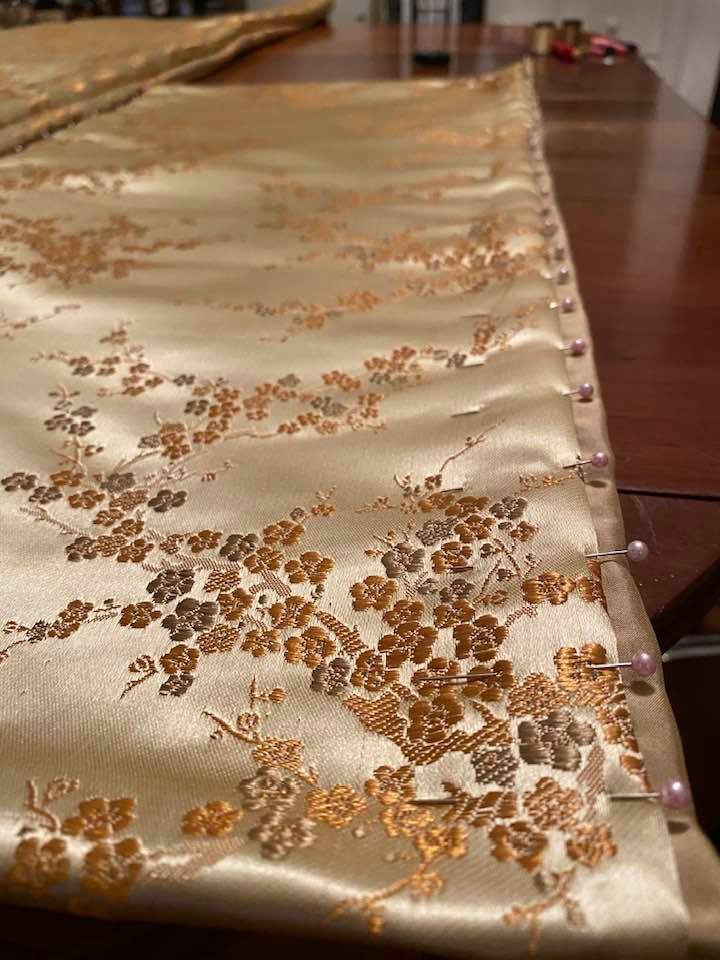
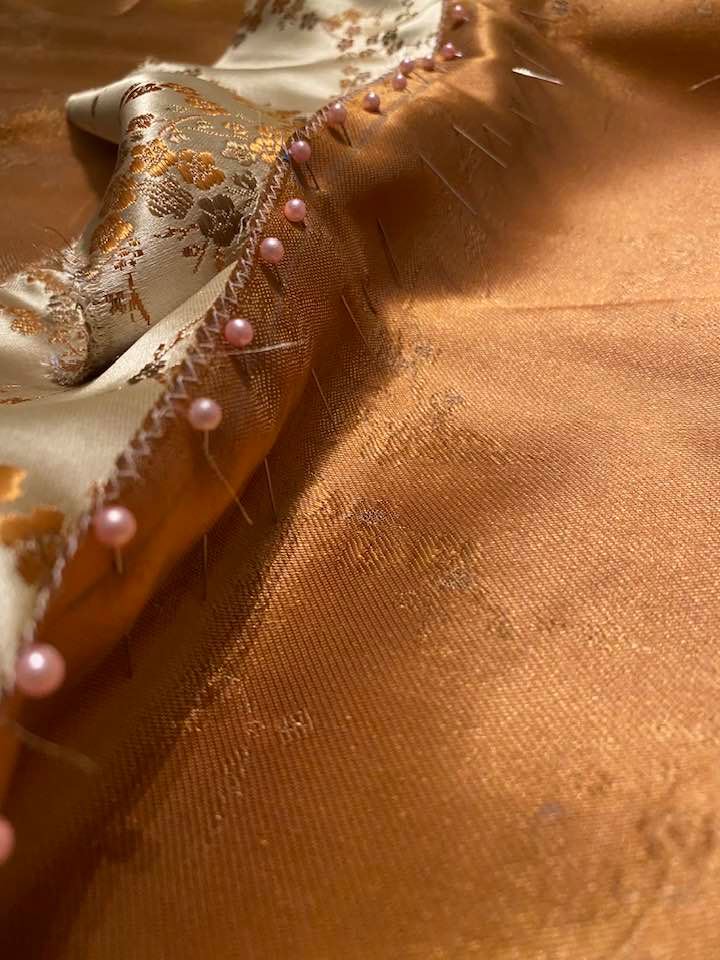
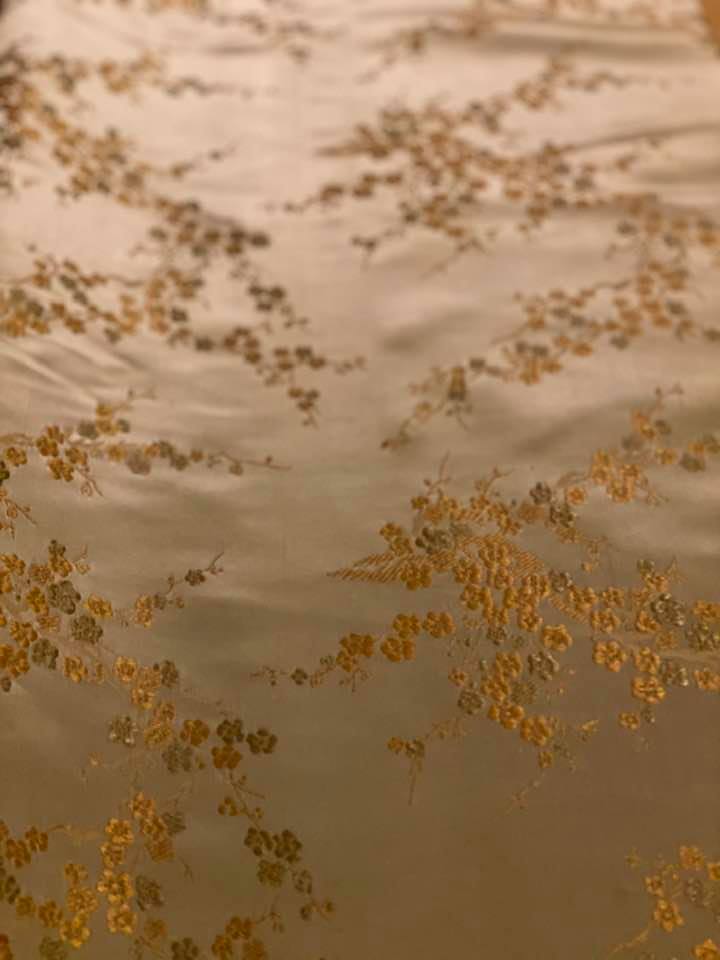
Obviously it gets entered as a research project. As my notes are physical, those notepads can be presented. I’ll want to have examples to show for each of the side projects it spurs. The first side project was Waka Wednesdays which will continue as its own series on my YouTube channel long after Genji is done. There will be garments to show off, possibly the plain white uwagi, a summer (white sheer) hitoe, and definitely the whole kobai project. I suppose I now have a deadline to finish that. For all of it really. I can include a syllabus/handout for the classes that come out of it; those are still in the development stage. What else … I started making a poetic reference document way back in the beginning but quickly discovered I was duplicating well established work that is already widely available. I’m not sure that I’ll do more with it. I’m considering going back through my costume reference notes and making a look book or something similar to make that research more consumable. Currently that’s just spread out through all of the chapter videos. Ooh, I think that means I’ll need to do a number of illustrations. Oh, and probably a fan or two. And let’s be honest, there’s bound to be something else by then.

Let’s see. Start the video with what inspired the project. Describe the project. Discuss the side projects created by embracing scope creep. Talk about the results, what I learned and next steps. That seems like a good outline.

I may be getting ahead of myself. But these side projects require more planning and more time, so I’m trying to get ahead of the inevitable crunch come January of 2028. The look book especially will take a tremendous amount of work. If I space everything out, I might just be able to finish it all. Maybe. I have a tendency to spread myself too thin.

a garden gently tended through the seasons will bloom ever brighter
when spring comes around again diligent steady work shines

For now, back to the main project. There’s quite a bit left to do and time is short.

Home Stretch

Complete save one sleeve I step back and admire it Could I be more pleased?

The flaws quickly forgotten As its beauty melts my stress.

I finished it! The uwagi is complete!

I’d love to take some time to celebrate, but that has to wait until everything is turned in.

I’ve returned to the hat for it’s final assembly. First I removed the old veil panel. I’m currently trimming the kazari-himo or decorative cords to the same length.

Once I’ve finished that (I’ve got one left) I have to contemplate how I’m actually slitting the veil panels to weave the cords through. I think I’m going to go with exactly what I can see in that zoomed in photo, a central outlet so the cords hang down the center of the veil panel and a slit to allow both cords to pass to the back of the veil at the seams of the panels. The majority of the time the cords are encased within the channel created by the stitched down overlap.

After cords are adjusted, I’ll stitch the entire completed veil and cord assembly to the hat. Crud, A curved needle would make that a whole lot easier. I don’t think I have one…yeah, I looked, no dice. I may heat up a needle and take some tools to it and shape my own curved needle. I’ve done it once before. That 15 minutes or less spent making that needle bent will save me twice that time. Yup. I guess that’s a thing I’ll do after finishing that cord.

Once the mushi no tareginu or veil panels are attached it’s all over but the pictures. I’m getting dressed and taking pictures as early as I can to give more time for finalizing submission materials. Crown’s A&S is only accepting 3 images, so I’ve planned out the 3 shots I want. My partner is going to play photog. We have plans for shooting both outside and inside and choosing the best. I’ll grab some extra stuff and some video as well.

After going over the documentation one more time, I’ll upload everything and send it off.

Here’s a cool bit, they’re giving us a couple extra days for the optional video! This means I can shoot my video on Monday and then have two days to edit it. I’m super stoked about the extra time, my video will be so much better than if I had rushed it tomorrow with the other materials.

Uwagi Final Touches

Let’s make some more progress on this list.

I have a lot to do today in order to finish this project. The goal is to get the uwagi completely finished so I can finish the hat tomorrow morning and take pictures in the afternoon. If things get dicey, I have Sunday as a back up day, but I really would prefer to leave Sunday for a final polish of documentation and making sure everything gets turned in. The deadline is 11:59pm Sunday for all materials to be turned in.

The deadline looms large And imposing, challenging This one to meet it.

Head down and back to work, there Is no time to spare today.

Time to make some tea and get to stitching.

First up, top stitch the entire edge. This took 5 hours.

Next, sleeves. I’m doing this start to finish one sleeve at a time starting with the right sleeve. This is a process. Before starting, I double checked the direction of the brocade and matched the sleeve to the body. Then I moved to the actual attaching steps. First I pressed the back edge of the sleeve, the body side, to it’s final position in topstitching in both the lining and fashion fabric. Sounds like a weird thing to start with, but this is best done before the sleeve is actually attached to the garment. Next I attach the sleeve lining to the body lining and stitch it on. The upper/outer fabric sleeve is then attached to the body. Once it’s all stitched on, I flip the outer over the lining and fuss with everything, lining it all up in prep for the next step. This took 3 hours.

Pinning the right sleeve. This took about an hour and a half.

Top stitch right sleeve. I’ve got another 45 minutes on this and I’ll have a completed sleeve. That means the other sleeve will take about 5 hours, so I guess it’ll be finished tomorrow.

Uwagi Pinned In

The next step is – Put it together with the lining???

Lost on the next step I see the final version Not the path to it

My kingdom for clarity, I need to read Japanese

I tried translating the page again. It made slightly more sense but not enough to clue me in. I think “discipline” and “baste” may be the same thing? Grr. Not that the distinction really helps. I feel so lost. I’ll try translating it again and hope some kind of inspiration strikes. I need to make significant progress on fitting the two halves together in order to finish the whole thing on time. If I get really stuck, I’ll assemble the hat so I keep moving forward.

I read through the translated instructions a few times and well, I know that I should put the body together first and then attach the sleeves, but I already knew that, so I guess the confirmation is nice? I still have only a glimmer of insight into how to put the two bits together. I guess I’ll just start pinning it all together and see what happens?

I’ve spent hours pinning the uwagi and I have the two pieces, lining and upper or fashion fabric, completely pinned together. Tomorrow I’ll start with stitching that all together then move on to the sleeves.

Approaching the Finish Line

We left off with pinning the collar on. That took a while to finish.

Stitch collar. Done.

Mark sleeves. Briefly pausing to iron the pieces before marking.

Stitch sleeves. Done.

Now I have to figure out how to put it all together. This is the part of the instructions that I wish I could translate better, because it makes no real sense. I wish I could translate it all better, but here we are.

I hear the Siren – A lilting distraction lures Me from my great task

Inspiration for the next thing competes for attention

I really am getting excited about the next major project. I put it on the back burner for C3 and Crown’s A&S. I’ll be starting that in February. Yay! But back to the current thing…

More to Do on the Uwagi Upper

Pin second okumi. You better believe I added these steps to the list when I decided to pin and then stitch individually. It’s a great way to trick my brain’s reward center because I’ll have another thing that’s “ding!” checked off a list. Plus it made me a little sad that I didn’t break up the other step, lesson learned and behaviour “corrected”. Ha.

Stitch second okumi. Done.

Press all the seams. I think I’m going to put a pin in this and move on to the collar shenanigans first, stopping to press before pinning. So onward to that.

Mark collar. Check.

Cut collar. Done.

Re-edge collar. Complete.

Mark collar. I paused to iron the piece before marking it. I also paused for tea.

The kettle whistles Thick steam billows from it’s spout And pours into cups

Pondering the floating leaves As the liquid grows darker

Iron all the things.

Pin collar. Almost halfway done with this step. Not sure if I’ll stay up to finish it or save it for the morning. Maybe some more tea while I think on that.

Continuing on the Uwagi Upper

Today’s first project task was to finish the side seams. The fabric isn’t incredibly unpleasant to sew. I’ll take that as a small win. Then I began work on the list.

Cut open center front and edge it. I should have made this two things for the satisfaction of completing two things.

Mark okumi. I’d say this took longer than I’d like, but at this point everything takes longer than I’d like. I’m still a little irritated by the minor decrease in precision due to the chalk pencil I’m using. But it is only a minor decrease.

Pin okumi. One side is now pinned on. I’m going to stitch it on, then pin the other side and stitch it.

Stitch okumi. This is my current step for okumi one. I think it’s the left.

Once again I’ve copied and pasted the rest of the tedious list in a draft for tomorrow’s post. It’s working really well to keep me on track.

The smell of woodsmoke Binds merry souls together On cold winter nights

Please keep the hearthfire burning, A candle in the window

Uwagi Upper

I marked the double wide migoro panel with a safety pin at the back hem. I have to carefully put the garment together making sure that all of the panels are running in the right directions. The brocade is directional. One of the okumi panels will be upside down. I think. I didn’t have enough fabric to flip the panel for cutting. It would have taken almost another 2 yards.

Let’s get my “tedious” list made so I can concentrate. Stress has sapped all my bandwidth.

Mark false back seam. Check.

Mark side seams and sleeve attachments. Done

Mark the okumi attachments. Complete.

Fold and pin false back seam. Done.

Stitch false back seam. Also complete.

Unfold and pin side seams. All set.

Stitch side seams. This is my current place, And I doubt I’ll get through both of them tonight, So I’m just going to copy and paste the rest of the list into tomorrow’s post. Easy Peasy. Though, that does not mean I expect to get all 14 things on that list done tomorrow. Oh no. That would be great, but I don’t sew that fast. Plus I still don’t know quite how I’m doing one of the steps…

The smoke drifts upward Gentle tendrils reaching out Embracing fragrance

The tea cup is slowly drained As the ember glows its last 

Pressing On

I finally went to bed last night after finishing the markings for the migoro and okumi (body and overlap).

Today I finished marking the sleeves and collar pieces, cut everything out, and edged all the pieces.

I’m covered in tiny synthetic threads. The way this stuff sheds is unbelievable. I honestly expected the fabric to be so awful I’d have to figure out something else. This just really reinforces to me that I don’t want to make anything from fabric like this ever again. Ick.

And tomorrow I start stitching the upper. I need to make one of those absolutely tedious lists of the steps again to keep myself on track.

The keyboard mocks me I hear laughter In the click Of each backspace press

The cursor calls with each pulse A taunt and promise of more

Determination in the Face of Stress

I deleted a paragraph from my post yesterday about how my anxiety is affecting my progress. I should have left it in. Basically, I was repeatedly browning out. I’d catch myself sitting or standing completely still, mind blank, like someone wiped my operating system. It’s a stress reaction I’ve come to expect from myself.

Here’s the big secret. My anxiety has beaten me in the past. I usually become physically ill and am unable to fully complete whatever it is, or just barely make it through. I need to make it through this pair of contests. The reward is worth it. The outfit will be gorgeous and help complete another ensemble. I’ll get to share my art. I don’t want to barely make it through, I want to finish strong.

So right now I’m fighting my anxiety. It has me on the ropes, and I desperately want to rally.

Anxiety lies. Turns deadlines into lions. Seizes momentum.

What truth awaits breaking through Entanglements of falsehoods?

I’m steadily working my way through the steps, one by one. I’ve finished marking the sleeves and am moving on to pinning them for stitching.

I paused after stitching the sleeves. I’m not positive how to join the lining to the upper. Right now I’m likely to fall back on whip stitches. Because order of operations for that is still jumbled in my head, I did not attach the sleeves to the lining. It may be best to finish the sleeves independently and attach the finished sleeves to the finished garment.

That makes it time to cut out the brocade.

I took the time to fiddle with my serger. It’s all but seized up. So that will not be an option for edging which means I’m overcasting the edge with a zig-zag stitch using my regular sewing machine.

The brocade is kinda icky. I had to change from my ceramic marking pencil to a broader (and less precise) chalk marker. Ugh. But there’s brocade in the floor and it’s slowly becoming covered in chalk marks. On the back. Because the fabric pulls if you mark the front. Boo.

Follow by Email
YouTube
YouTube