Attaching the Okumi

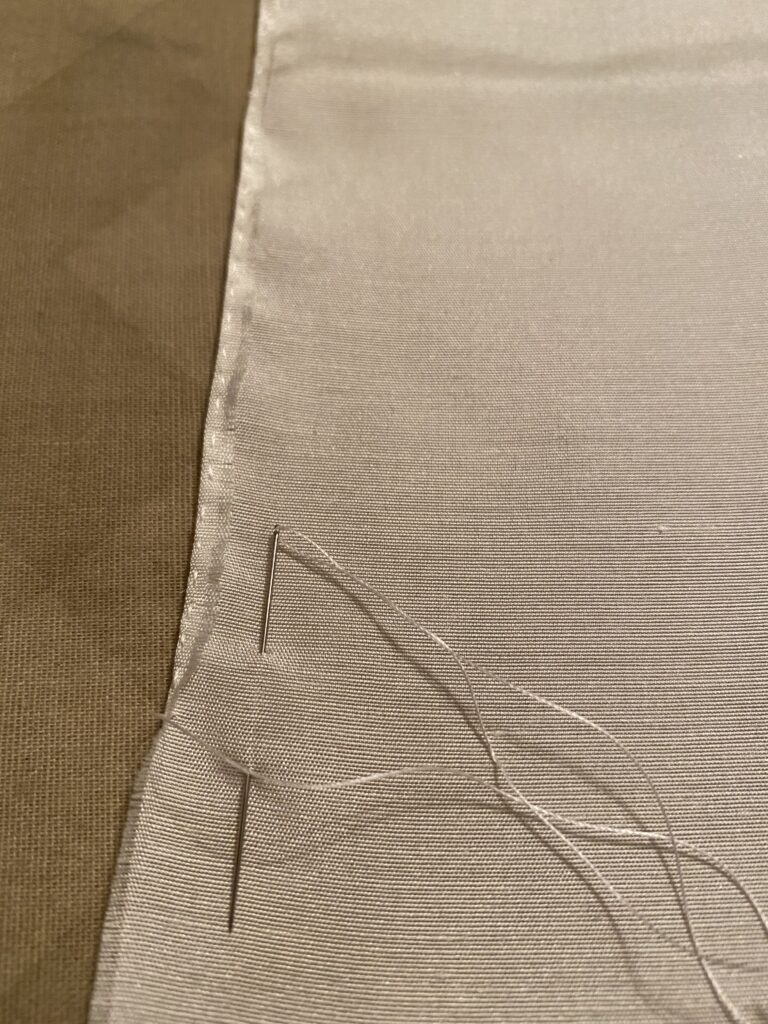
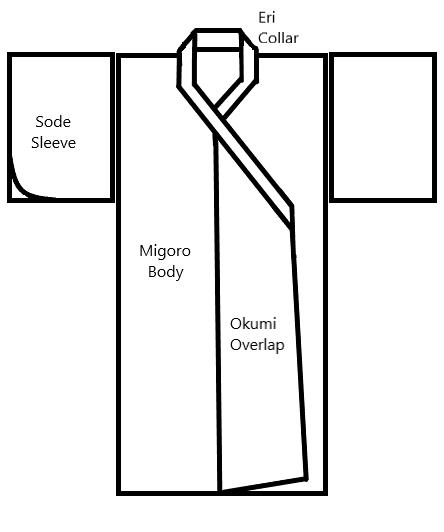
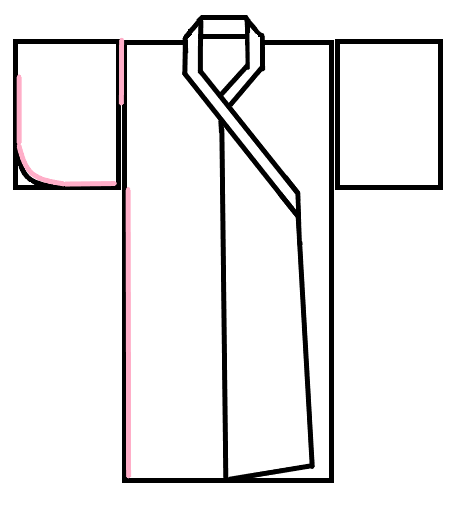
Today feels really productive. I cut down the okumi, overlap panels, cut open the migoro, body panels, and pinned everything together.

White fabric lays across a wooden table. The outside edges of the fabric are each studded with pink-headed straight pine.

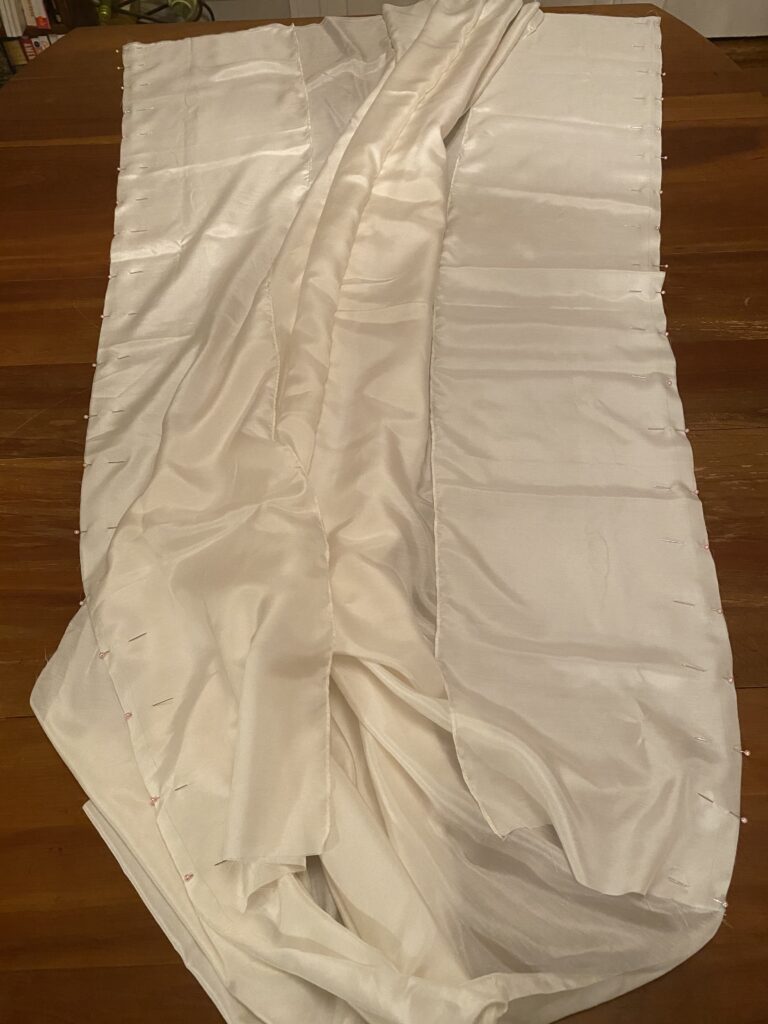
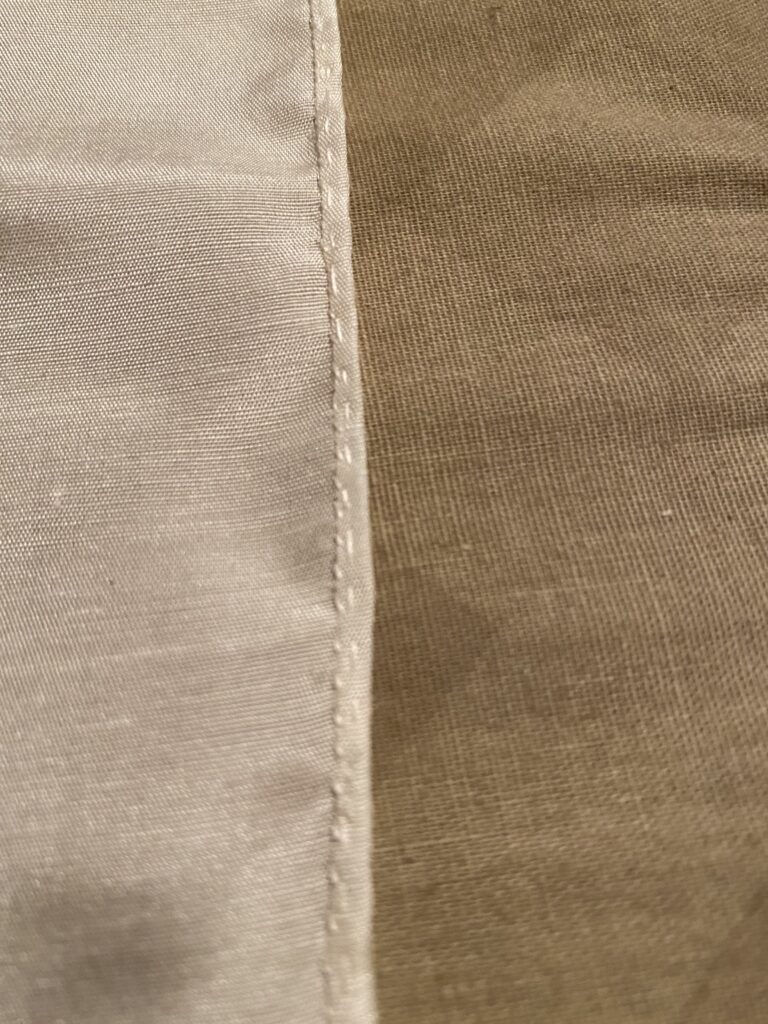
Stitching the okumi on to the migoro is progressing nicely, and I’ll likely finish before I go to bed. That should probably read I won’t go to bed until I finish.

I’ve been thinking about all the kosode I’ve made. This one is almost the same, but so far, the differences are immense.

The fabric choice. I’ve made kosode from multiple weights of cotton and linen. Nothing compares to how fine working with the silk is. I’m sitting with the majority of the garment in my lap while stitching and it’s just so light and folds down so small.

Stitching. It is taking eons longer to sew by hand than it did by machine. My seams are just as straight. The machine has more precision in stitch length. But my little running stitches don’t randomly produce bobbin vomit (this is when the bottom or bobbin thread on the machine gets loopy and becomes this awful mass of thread). I’m also enjoying sewing by hand for the sheer lack of noise. Sewing machines are loud. Tension is a toss up between the two.

A different take / On a tune I heard before / Once upon a time / Meter and rhyme – changed, but / This feeling has the same score.

Okumi Today, Okumi Tomorrow

It was already / Later than I had hoped / And my muse spoke not / I let the silence whisper / Inspiration in her stead

Finally.

I finished hemming the second okumi, overlap panel, tonight. I expect things to start to progress rapidly from here. This step was a time sink. Yet another reason to try not to ever do it again.

Hindsight being 20/20, I’ve already figured out how I could have avoided hemming the okumi during layout this time. Not super helpful until I make another kosode with the same width fabric. The next garment, the hitoe, needs selvage edges for the sleeves and the overlap panels in order to avoid hemming work.

And I still haven’t settled on how to finish the seams.

Tomorrow I’ll start in on the steps I outlined for the okumi attachment in yesterday’s post.

Okumi Blues

I’m still working on hemming the okumi (overlap panels).

Warm days in autumn / Are a gentle reminder / Of summer now gone / Thoughts to brace against the cold / As we move toward winter

Progress is progress and I have at least finished one of the okumi.

Here’s what I’m doing. First I fold the edge over about 1/16 inch. I put a running stitch through that to hold it down, approximately 8 stitches per inch.

The edge of the white silk fabric has been folded over 1/16 inch and secured with a running stitch. A needle threaded with white thread is woven through the fabric.

After I’ve run a line of stitching down one side, I fold it over again and secure it with a felling or whip stitch at approximately 10 stiches per inch.

A rolled hem on white silk fabric.

Once I finish the second okumi, I’ll slice the migoro (body) open along the front -if you recall, I left the two body panels in one piece. I’ll then cut the unhemmed long edge of the okumi at an angle. That angle is then sewn to the migoro body panel.

I’m not sure if I’ll attach the eri (collar) after that or the sode (sleeves). Time will tell.

Right now it’s time to get back to hemming.

Idle hands

Held my breath so long / I almost forgot to breathe / But was reminded / Gently, to relax again / After an eternity

For almost a full day, I didn’t sew.

And now I’m actually concerned about my pace. Maybe I just need to really settle in to it. I feel like I keep saying that. It was also a tremendously stressful week. I feel like I keep saying that as well.

Time to buckle down and start making serious progress. Am I repeating myself with that too?

I have made good progress this evening. I’ve almost finished hemming the edge of one of the okumi overlap panels. I should keep in mind that I won’t have to do this again on the other two garments. Lesson learned about cutting particular pieces on the selvage edge.

And hey, that’s one full week of poems for the #tankachallenge. Actually proud of that.

Constructing a Kosode

One of the fun parts of Japanese costuming is once you get the basic idea in your head of how to construct a garment, you are essentially prepared to make the majority of top of the body (hangs from the shoulders) garments. Kosode, hitoe, ginu, uchigi, uwagi, hitatare – you can build them all! Bonus- all of these garments are also incredibly similar in construction to the modern kimono.

Here is a basic front view diagram of a top of body Japanese garment:

A simple geometric line drawing or diagram of a Japanese garment. A large rectangle with two smaller rectangles either side of the larger rectangle's top making a capital "t".There is a section in the top middle of the large rectangle shaped like a backwards nine extending to just above the middle of the rectangle labeled, eri, collar. The small rectangle on the left is labeled sode, sleeve. Half of the large rectangle has the label migoro, body, and atached to the bottom angle of the eri and the migoro is a 4 sided shape labeled okumi, overlap.

That image should make it easier to visualize the kosode that is being worked on.

So you might have noticed that one of the sode (sleeves) has a curved line in the bottom outside corner. That’s because I’m not sure if it should be curved or straight. The kosode is called that because of the sleeve, ko meaning small and sode, sleeve. Small refers to the opening of the sleeve. Unlike the other women’s garments of the Heian period that layer on top, the kosode sleeve is sewn shut for most of the front/outside edge.

Another diagram:

The same diagram as above but without labels. on the left side of the image, the shoulder seam are, most of the outside and bottom edge of the sleeve and the side seam from the bottom edge of the sleeve to the hem are highlighted in pink.

The pink lines represent stitching. The sleeve is sewn closed at the bottom and front, leaving an opening big enough for the hand to slip through. The sleeve is attached at the shoulder, but is not completely attached to the body of the garment. This creates a “swinging sleeve”. The back of the sleeve nearest the body and a section of the side seam are both left open.

Back to the sleeve corner…In later periods the kosode becomes an outer garment and is, in my opinion, the direct ancestor of the kimono. And it has rounded sleeve corners. But I have no idea when the sleeve went from a stitched bottom and outside edge to having a gentle curve in the corner. It’s a natural progression from a construction standpoint. And I’m strongly leaning toward rounding the corners of my sleeves.

Sewing progress-wise I’m hemming the okumi.

And the tanka for today:

I’ve watched your colors / Change and deepen over time / Yellow, now gold and / The festive frock of autumn / Dances with wind on the lawn.

Side Seams Complete

I wanted to write  / A clever pun about tea, / But grief consumes me. / Will tears dilute this bitter / Drink I’ve left to steep too long?

Today hurt. Last day at my dream job. There hasn’t been room for much besides grief.

I made a good deal of progress last night after my update. I stayed up much too late, but the left side seam is now complete. Things went much more quickly after I decreased the stitches per inch back to where they were supposed to be.

I’ve been stewing today over next steps. At this point in the process I can either attach the sode (sleeves) or the okumi (overlap panels). I’ll likely stitch the sleeves into shape while I think about it. I’m wishing I had decided to cut the okumi on the selvage edge so I wouldn’t have to hem them. That’s another thing I can do while I decide between sleeves and overlap panels. And I’ll make sure to cut the next two garments with okumi on selvage edges.

Side Seams and Suspense

Watching colors change / Is an honored fall pass time / I did not expect / To hold my breath for so long / While waiting for leaves to drop

I finished the right side seam. That felt like an uncomfortably long 40 inches. And I need to step up the pace.

Granted, tomorrow is my last day of work, so my “distractions” will become quite limited.

Or maybe I need to be more careful about my stitches per inch.

The first two inches of a yellow measuring tape next to a handsewn seam of approximately 20 stitches per inch.

Somehow I got things turned about and was back at about 20 stitches per inch. I need to be more careful. Lets see if I can get back in the right range on the left side seam.

The best part about the left seam is that it is all selvage edge. I still need to decide how I want to finish the right side seam as it is a cut edge.

Side Seams and Stress

Stitching on the side seams continues. Slowly. And today, sporadically.

Distracted today / My thoughts chased away like birds / Flushed from a bush / Will they return to their roost / When the danger has passed?

I’d take a series of stitches and then space out, shake it off and repeat. I’ve picked it up and set it down multiple times. And increasingly, I’m frustrated that I’m this stressed.

If that sounds like a vicious circle forming, you’re not wrong.

The poems are a nice little reprieve though. I’ve written a few tanka before, and find the form both relaxing and challenging. I experience a lot of freedom in structure – my brain is wired that way. I would like to perhaps try to lace my poems with puns and layer in references to other poems the way it was common (and ideal) to do during the Heian period.

Side Seams and Uncertainty

Uncertainty looms / As the dread day approaches / The future at stake / Will every voice be heard now / Or will courts decide again?

Election day is tomorrow and it’s my last week of work. I’m trying to acknowledge the amount of uncertainty and fear I have right now. It’s a lot. I find myself relying on my project for comfort. It’s nice to have something that will be exactly as I left it the next time I pick it up.

My new thimble arrived. I plan to watch a few more instructional videos on unshin (a traditional though not period documentable Japanese sewing method) and then give it a shot on some scrap fabric later this week.

Stitching of side seams continues.

Tanka

I finished the false back seam of the kosode last night.

Darting to and fro / Above and below the silk / Racing through the task / My needle leads thread along / A delicate hide and seek

It seems my desire to write poetry was well timed. Saionji no Hana has issued her yearly challenge for November, one tanka every day for a month. Yes, please.

So what’s a tanka? It’s a form of waka or Japanese poetry. You’re likely familiar with the more modern haiku, a poem with a syllabic count of 17 in a 5/7/5 arrangement. The tanka was exceptionally popular in the Heian period. It has a syllabic count of 31 in a 5/7/5/7/7 arrangement, and was usually written as a single line.

I’m excited to share what I come up with here and on the SCA Japanese Facebook group.

As for the kosode, I decided to move on to the side seams next. I’ve marked both sides with a 1 cm seam allowance and a stop point 40 inches from the hem.

I broke down the task of sewing the kosode into chunks, in this case, each seam has about a day. Following this, I should finish the kosode in just over a week. November 12 is the garment due date I’ve set. I may need the few days wiggle room to finish the raw edges of the silk with a rolled hem.

I also completed my first monthly check in for C3 yesterday. So far, so good.

Follow by Email
YouTube
YouTube